
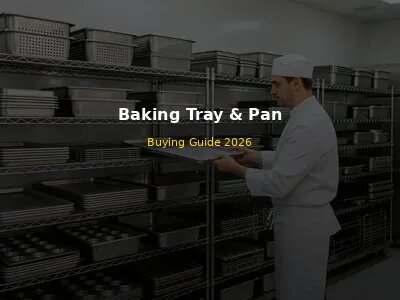
A story from our customer in Chicago, USA: "When we opened our bakery in 2019, we bought the cheapest baking trays we could find - thin aluminum pans from a restaurant supply store, $8 each. We thought a tray is a tray, right? Wrong. Within 3 months, the cheap trays started warping in the oven - they would bend and twist at high temperatures, causing the dough to slide to one side and bake unevenly. Some trays developed rust spots because the aluminum was low quality. The rims were so thin that they bent when we stacked trays, making them impossible to stack neatly. We were constantly replacing trays - we went through 30 trays in the first year, costing us $240 plus the cost of wasted product from uneven baking. We finally invested in high-quality 1.5mm thick food-grade aluminum trays with reinforced rims, $25 each. The difference was night and day: no warping, no rust, sturdy rims that stack perfectly, even heating across the entire tray. We bought 50 of them for $1,250, and 3 years later they are still in perfect condition. The cheap trays ended up costing us more Over time - $240 (replacement) + thousands in wasted product + $1,250 (replacement with good trays) = over $1,500, when we could have just bought the good trays from the start. The lesson: baking trays are the foundation of your product quality. Cheap, flimsy trays produce cheap, inconsistent products. Invest in quality trays from the start - they will last for years and pay for themselves through consistent product quality and reduced waste."
Baking trays (also called sheet pans, baking sheets, or baking pans) are one of the most fundamental and necessary pieces of equipment in any bakery. They are the surface on which your products are baked, and their quality directly affects the quality, consistency, and appearance of everything you bake. A good baking tray ensures even heat distribution, consistent baking, easy release, and long-term durability. A bad baking tray causes uneven baking, warping, sticking, rust, and wasted product.
Despite their importance, baking trays are often an afterthought for many bakery owners. They buy the cheapest trays available, thinking "a tray is a tray," and then wonder why their products bake unevenly or why they are constantly replacing trays. As our customer in Chicago learned, cheap trays are a false economy - they cost more Over time through replacements, wasted product, and inconsistent quality.
The numbers tell a clear story: bakeries that choose the right equipment see 30-50% higher profit margins. The ones that don't? They're replacing machines within 2-3 years.
When it comes to commercial baking, choosing the right equipment is crucial for bakery success. HNH Bakery Equipment provides professional commercial baking solutions for bakeries worldwide. In this guide, we explore everything you need to know about commercial baking and how to select the best equipment for your bakery.
1. Materials: Which is Best for Your Bakery?
The material of your baking trays is the most important reason in determining their performance, durability, and price. There are four main materials used for commercial baking trays, each with its own advantages and disadvantages.
1.1 Food-Grade Aluminum (Most Common)
Aluminum is the most popular material for commercial baking trays, and for good reason. It offers an Great balance of performance, durability, and affordability.
Advantages:
- Great heat conductivity: Aluminum heats up quickly and evenly, ensuring consistent baking across the entire tray. This is important for uniform product quality, especially in high-volume production where consistency is paramount.
- Lightweight: Aluminum trays are much lighter than stainless steel, making them easier to handle, stack, and move around the bakery. This reduces employee fatigue and the risk of injury, especially when trays are full of heavy product (bread, cakes).
- Affordable: Aluminum is noticeably less expensive than stainless steel, making it the economical choice for bakeries that need many trays (50-200+ trays). The cost savings can be large when buying in bulk.
- Good durability: High-quality food-grade aluminum (3003 or 5052 alloy, 1.0-1.5mm thick) is durable and resistant to corrosion. With proper care, quality aluminum trays can last 5-10+ years.
- Non-reactive (with most foods): Pure aluminum is non-reactive with most bakery products. Anodized aluminum is even more non-reactive and scratch-resistant.
- Naturally non-stick (when seasoned): With use, aluminum trays develop a natural patina that provides some non-stick properties. Many bakers prefer aluminum for this reason.
Disadvantages:
- Can dent or scratch: Aluminum is softer than stainless steel and can dent or scratch more easily, especially if dropped or mishandled. Dents can affect the tray's flatness and cause uneven baking.
- Can warp at high temperatures: Thin aluminum trays (less than 1.0mm thick) can warp at high temperatures (above 230C/450F). This is why it's important to choose trays that are at least 1.0mm thick, preferably 1.2-1.5mm.
- Reacts with acidic foods: While aluminum is non-reactive with most bakery products, highly acidic doughs (tomato, citrus, vinegar) can cause some discoloration or reaction over time. Anodized aluminum avoids this issue.
- No metal utensils: Metal utensils (knives, spatulas, scrapers) can scratch aluminum surfaces. Use plastic, silicone, or wooden utensils instead.
Best for: General-purpose baking in most commercial bakeries. The best all-around choice for cookies, pastries, bread rolls, sheet cakes, and most other products. Ideal for bakeries that need many trays at an affordable price.
1.2 Food-Grade Stainless Steel (Premium Choice)
Stainless steel is the premium choice for commercial baking trays, offering Great durability and corrosion resistance at a higher price point.
Advantages:
- Great durability: Stainless steel is quite durable, resistant to dents, scratches, and warping. It can last 10-20+ years with proper care, making it a good long-term investment despite the higher upfront cost.
- Corrosion resistant: Stainless steel (especially 304 and 316 grades) is highly resistant to corrosion, rust, and staining, even with acidic foods and frequent washing. It will not rust or discolor over time.
- Fully non-reactive: Stainless steel is fully non-reactive with all foods, including acidic doughs and fillings. No discoloration or flavor transfer.
- Easy to clean and sanitize: Stainless steel has a smooth, non-porous surface that is easy to clean and sanitize. It is dishwasher safe and can withstand harsh cleaning chemicals and high-temperature sanitizing.
- High heat resistance: Stainless steel can withstand quite high temperatures (up to 300C/570F+) without warping, making it suitable for all baking applications including high-heat baking and broiling.
- Hygienic: Stainless steel is the most hygienic material for food contact surfaces - it does not harbor bacteria and is easy to keep clean. This is why it is the standard material in commercial kitchens and food processing facilities.
Disadvantages:
- Poor heat conductivity: Stainless steel is a poor conductor of heat compared to aluminum. It heats up more slowly and less evenly, which can result in uneven baking (hot spots). To compensate, many high-quality stainless steel trays have an aluminum core or cladding (tri-ply construction: stainless steel - aluminum - stainless steel) for better heat distribution.
- Heavy: Stainless steel trays are noticeably heavier than aluminum (about 2-3x heavier), making them more difficult to handle, especially when full of product. This can increase employee fatigue and injury risk, especially for older or smaller employees.
- Expensive: Stainless steel trays cost 2-3x more than equivalent aluminum trays. For a bakery needing 100+ trays, this can be a notable investment.
- Food sticks more easily: Stainless steel is not naturally non-stick. Products are more likely to stick to stainless steel trays unless they are greased, lined with parchment paper, or have a non-stick coating.
Best for: High-end bakeries, pastry shops, and operations where durability, hygiene, and non-reactivity are paramount. Also ideal for acidic products, high-heat baking, and environments where trays are frequently washed in industrial dishwashers. Worth the investment if You can afford it and plan to use the trays for 10+ years.
1.3 Aluminized Steel (Middle Ground)
Aluminized steel is steel with an aluminum-silicon alloy coating, offering a middle ground between aluminum and stainless steel For performance and price.
Advantages:
- Good heat conductivity: Better than stainless steel, slightly less than pure aluminum. The aluminum coating provides good heat distribution while the steel core provides strength and durability.
- Good durability: More durable and resistant to warping than pure aluminum, though less durable than stainless steel. The steel core provides rigidity and strength.
- Affordable: Less expensive than stainless steel, slightly more expensive than pure aluminum. Good value for the price.
- Corrosion resistant: The aluminum coating protects the steel core from corrosion, though if the coating is scratched or damaged, the underlying steel can rust.
- Naturally non-stick (when seasoned): Like aluminum, aluminized steel develops a natural non-stick patina with use.
Disadvantages:
- Coating can wear off: Over time and with frequent washing, the aluminum coating can wear off, exposing the steel core which can then rust. The lifespan is typically 3-7 years, less than stainless steel.
- Heavier than aluminum: Aluminized steel is heavier than pure aluminum, though lighter than stainless steel.
- Not as heat resistant as stainless steel: Can warp at quite high temperatures if not thick enough.
Best for: Bakeries that want better durability than pure aluminum but don't want to pay stainless steel prices. Good for general-purpose baking, especially for bread and rolls. A popular choice in many commercial bakeries.
1.4 Carbon Steel (Black Steel / Blue Steel)
Carbon steel (also called black steel or blue steel) is a traditional material used in some European bakeries and for specific applications like artisan bread baking.
Advantages:
- Great heat retention and even heating: Once preheated, carbon steel provides Great, even heat distribution. It is prized by artisan bakers for producing bread with a crisp, even crust.
- Quite durable: Carbon steel is quite durable and can last decades with proper care. It is more resistant to dents than aluminum.
- Develops natural non-stick patina: With proper seasoning (baking with oil), carbon steel develops a natural, non-stick patina that improves with age. Many bakers prefer this natural non-stick surface to chemical non-stick coatings.
- Affordable: Less expensive than stainless steel, comparable to or slightly more expensive than aluminum.
- High heat resistance: Can withstand quite high temperatures (up to 300C/570F+) without warping.
Disadvantages:
- Requires seasoning and maintenance: Carbon steel must be seasoned before first use and re-seasoned periodically. It requires more care than aluminum or stainless steel.
- Rusts easily: Carbon steel rusts easily if not properly dried after washing. It must be dried immediately and thoroughly, and lightly oiled to prevent rust. Not suitable for dishwasher use.
- Reacts with acidic foods: Carbon steel reacts with acidic foods, causing discoloration and off-flavors. Not suitable for acidic doughs or fillings.
- Heavy: Carbon steel is heavier than aluminum, though lighter than stainless steel.
- Not as versatile: Because of the maintenance requirements and reactivity, carbon steel is best for specific applications (artisan bread, high-heat baking) rather than general-purpose use.
Best for: Artisan bakeries, bread specialists, and bakers who prefer traditional materials and methods. Ideal for baking bread, baguettes, and other products where a crisp, even crust is desired. Not recommended for general-purpose use or for bakeries that don't want the maintenance burden.
1.5 Material Comparison Table
| Material | Heat Conductivity | Durability | Weight | Cost | Non-Reactive | Maintenance | Best For |
|---|---|---|---|---|---|---|---|
| Aluminum | Great | Good (5-10 yrs) | Light | Low | Most foods | Low | General-purpose, most bakeries |
| Stainless Steel | Poor (needs core) | Great (10-20+ yrs) | Heavy | High | All foods | Low | High-end, acidic foods, heavy use |
| Aluminized Steel | Good | Good (3-7 yrs) | Medium | Medium | Most foods | Low | General-purpose, bread/rolls |
| Carbon Steel | Great (when preheated) | Great (decades) | Medium-Heavy | Medium | No (reacts with acid) | High (seasoning) | Artisan bread, traditional baking |
Material Recommendation
For most commercial bakeries, food-grade aluminum (1.0-1.5mm thick, with reinforced rims) is the best choice for general-purpose baking trays Because of its Great heat conductivity, light weight, and affordability. If budget allows and you want the ultimate in durability and hygiene, stainless steel with aluminum core (tri-ply) is worth the investment. For artisan bread baking, carbon steel is a traditional favorite. At HNH Bakery Equipment, we offer trays in all four materials and can help you choose the best option for your specific products and budget.
2. Sizes: Standard Sizes for Commercial Bakeries
Commercial bakeries use standardized baking tray sizes to ensure compatibility with ovens, proofers, racks, and equipment. Using standard sizes simplifies operations, reduces confusion, and ensures all trays fit all equipment. The most common sizes vary by region.
2.1 North American Standard Sizes
| Size Name | Dimensions (inches) | Dimensions (mm) | Common Uses |
|---|---|---|---|
| Full-size sheet pan | 18 x 26 | 457 x 660 | Standard production size, fits commercial ovens and racks |
| Two-thirds sheet pan | 16 x 22 | 406 x 559 | Smaller ovens, two fit side by side in some ovens |
| Half-size sheet pan | 13 x 18 | 330 x 457 | Small batches, retail bakeries, cafes, two fit on full rack |
| Quarter-size sheet pan | 9 x 13 | 229 x 330 | Tiny batches, sample testing, retail display, four fit on full rack |
2.2 European Standard Sizes
| Size Name | Dimensions (mm) | Dimensions (inches) | Common Uses |
|---|---|---|---|
| GN 1/1 (Gastronorm) | 530 x 325 | 20.9 x 12.8 | European standard, fits combi ovens and refrigeration |
| GN 1/2 | 325 x 265 | 12.8 x 10.4 | Half of GN 1/1, two fit side by side |
| GN 2/3 | 354 x 325 | 13.9 x 12.8 | Two-thirds of GN 1/1 |
| European baking tray | 600 x 400 | 23.6 x 15.7 | Common European rack oven and deck oven size |
2.3 Specialty Pan Sizes
- Loaf pans: Standard 1lb loaf: 22 x 12 x 12 cm (8.5 x 4.5 x 4.5 inches); 2lb loaf: 28 x 13 x 13 cm (11 x 5 x 5 inches). Available in non-stick, glass, aluminum, and stainless steel.
- Cake pans: Round: 6, 8, 9, 10, 12, 14 inch diameters; Square: 8, 9, 10, 12 inches; Rectangular: 9x13, 10x15, 12x18 inches; Springform: 8, 9, 10 inches (for cheesecakes and tortes).
- Muffin tins: 6-cup (large muffins), 12-cup (standard), 24-cup (mini muffins). Available with non-stick coating or silicone liners.
- Baguette trays: Perforated trays with molded slots for 2, 3, 4, 5, or 6 baguettes. The perforations allow air circulation for crisp crusts.
- Croissant trays: Perforated trays with molded shapes for croissants, ensuring uniform shape and even baking.
- Tartlet tins: Various sizes (3, 4, 5, 6 inch diameters), fluted and straight-sided, with removable bottoms for easy release.
- Pizza pans: Various sizes (10, 12, 14, 16, 18 inch diameters), deep dish and thin crust styles.
- Cooling racks: Wire racks that fit inside full-size or half-size trays, allowing air circulation under cooling products.
2.4 How to Choose the Right Size
- Check your oven capacity: Measure the interior of your oven(s) to figure out what size trays fit. Most commercial ovens are designed for standard full-size trays, but always check. Consider both width and depth, and whether You can fit trays side by side.
- Consider your production volume: High-volume wholesale bakeries typically use full-size trays to maximize oven capacity and efficiency (more product per load = fewer loads = less labor and energy). Smaller retail bakeries or cafes may prefer half-size or quarter-size trays for smaller batches, easier handling, and less waste if a product doesn't sell.
- Consider your product type: Some products require specific tray sizes or shapes (e.g., baguette trays, croissant trays, loaf pans, cake pans). For general-purpose products (cookies, pastries, rolls), standard full-size or half-size trays work well.
- Consider your rack system: If you use rolling racks, proofing racks, or cooling racks, ensure your trays fit the rack dimensions. Standard racks are designed for full-size trays (18x26 inch or 600x400mm). Using non-standard sizes may mean trays don't fit properly.
- Consider stacking and storage: Larger trays take up more storage space. If storage is limited, smaller trays may be more practical. Also consider the weight of full-size trays when stacked - a stack of 20 full-size trays full of product can be quite heavy.
- Standardize whenever possible: Use one standard tray size throughout your bakery whenever possible. This simplifies operations (all trays fit all ovens, racks, and equipment), reduces confusion, makes inventory management easier, and allows flexibility in tray usage. Most bakeries standardize on full-size trays for production, with a few specialty trays for specific products.
3. Types of Baking Trays
Beyond material and size, baking trays come in several types designed for specific applications.
3.1 Flat Trays (No Rim / Open Rim)
Flat trays have no raised rim (or a quite low rim of 2-5mm), allowing products to slide off easily and maximizing usable surface area.
- Best for: Cookies, biscuits, pastries, products that are removed from the tray while warm, products that need maximum surface area.
- Advantages: Maximum usable space, easy to slide products off, easy to clean, stackable.
- Disadvantages: Products can slide off if tray is tilted, juices or melted butter can run off the edges, not suitable for products with liquid batter or high moisture content.
3.2 Rimmed Trays (Sheet Pans with Sides)
Rimmed trays have a raised rim (typically 20-30mm / 1 inch) around all four sides, containing products and liquids.
- Best for: Bread rolls, pastries, sheet cakes, roasted vegetables, meat, products with juices or high moisture, general-purpose baking. The most versatile and common type of commercial baking tray.
- Advantages: Contains products and liquids, prevents spills, can be used for roasting and baking, stackable with rims interlocking, more rigid and resistant to warping.
- Disadvantages: Slightly less usable surface area than flat trays, products near the edges may bake slightly differently Because of the rim.
3.3 Perforated Trays
Perforated trays have small holes or slots punched through the surface, allowing air circulation around products during baking.
- Best for: Bread, baguettes, croissants, pastries, pizza, and any product where a crisp, dry bottom crust is desired. The perforations allow hot air to circulate under the product, ensuring even baking and crisp crusts.
- Advantages: Better air circulation = more even baking and crispier crusts, faster baking times, less sticking (air gets under product), reduces sogginess on the bottom of products.
- Disadvantages: Not suitable for products with liquid batter or high moisture content (will drip through holes), small products may fall through holes, more difficult to clean (holes can trap food particles), slightly more expensive than solid trays.
3.4 Non-Stick Coated Trays
Non-stick trays have a coating (typically PTFE/Teflon or ceramic) applied to the baking surface, preventing products from sticking.
- Best for: Cookies, biscuits, pastries, products that tend to stick, reducing the need for greasing or parchment paper.
- Advantages: Easy release of products, less need for greasing or parchment paper (saves time and money), easy to clean, consistent results.
- Disadvantages: Coating can scratch or chip (especially with metal utensils), coating wears off over time (typically 1-3 years with heavy use), cannot be used with metal utensils, may not be suitable for quite high temperatures (above 230C/450F for some coatings), some bakers prefer the natural patina of uncoated aluminum, more expensive than uncoated trays.
3.5 Silicone Baking Mats
While not technically trays, silicone baking mats (e.g., Silpat) are placed on top of baking trays to provide a non-stick, heat-resistant surface.
- Best for: Cookies, pastries, macarons, candy making, any product that needs a non-stick surface and even heat distribution.
- Advantages: Great non-stick properties, even heat distribution, reusable (thousands of uses), easy to clean (dishwasher safe), removes need for parchment paper or greasing, can be used on any tray.
- Disadvantages: Expensive upfront ($15-$30 per mat), can retain odors, not suitable for products that need a crisp bottom (silicone insulates), can be damaged by sharp objects, takes up storage space, may shift on the tray.
3.6 Stackable Trays
Stackable trays are designed with special rims or corners that allow them to stack securely without nesting (sticking together), creating space between trays for air circulation during proofing or cooling.
- Best for: Proofing dough, cooling products, transporting products, storage. fundamental for bakeries that proof or cool products on trays.
- Advantages: Secure stacking without nesting, space between trays for air circulation, easy to transport on racks, saves space during proofing/cooling.
- Disadvantages: Slightly more expensive than standard trays, the stacking mechanism may add weight or complexity, may not be compatible with all rack systems.
3.7 Type Comparison Table
| Type | Best For | Advantages | Disadvantages |
|---|---|---|---|
| Flat (no rim) | Cookies, pastries | Max space, easy release | Products can slide off, no liquid containment |
| Rimmed (sheet pan) | General-purpose, rolls, cakes | Contains products/liquids, versatile, rigid | Slightly less surface area |
| Perforated | Bread, baguettes, croissants | Crisp crusts, even baking, less sticking | Not for liquid batter, harder to clean |
| Non-stick coated | Cookies, sticky products | Easy release, less greasing | Coating wears off, no metal utensils |
| Silicone mat | Cookies, macarons, candy | Great non-stick, reusable | Expensive, retains odors, no crisp bottom |
| Stackable | Proofing, cooling, transport | Secure stacking, air circulation | More expensive, may not fit all racks |
4. How Many Trays Do You Need?
Calculating the right number of baking trays for your bakery is important - too few and you'll be constantly washing trays or running out during peak production; too many and you're wasting money and storage space. As detailed in the FAQ section, the number depends on oven capacity, production volume, cycle time, proofing needs, cooling needs, and buffer stock.
4.1 Quick Reference by Bakery Size
| Bakery Size | Flour Usage | Ovens | Full-Size Trays Needed |
|---|---|---|---|
| Small bakery/cafe | <50 kg/day | 1-2 | 20-40 + specialty trays |
| Medium bakery | 50-200 kg/day | 2-4 | 50-100 + specialty trays |
| Large bakery/wholesale | 200+ kg/day | 4+ | 100-300+ + specialty trays |
| Industrial bakery | 1000+ kg/day | Automated line | 300+ (often automated handling) |
These are rough estimates - your actual needs will vary from your specific products, schedule, and equipment. When in doubt, it's better to have slightly more trays than you think you need, rather than running out during peak production. Most bakeries find that having a 20-30% buffer of extra trays is ideal.
5. Care and Maintenance
Proper care and maintenance will extend the life of your baking trays and ensure consistent performance. Here are the important practices:
5.1 Cleaning
- Wash after each use: Wash trays after each use to remove food residue, grease, and baked-on particles. For most bakeries, this means daily washing (or more frequently if switching between allergen-containing and allergen-free products).
- Use appropriate cleaning method:
- Aluminum and aluminized steel: Wash with warm soapy water and a soft sponge or cloth. Avoid abrasive scouring pads or harsh chemicals (they can scratch or discolor the surface). For baked-on residue, soak in warm soapy water for 10-15 minutes before washing. Dishwasher safe, but frequent dishwasher use may cause discoloration over time.
- Stainless steel: Wash with warm soapy water and a sponge or scouring pad (stainless steel is scratch-resistant). Can use harsher chemicals if needed. Dishwasher safe. For stubborn stains, use a stainless steel cleaner or a paste of baking soda and water.
- Carbon steel: Wipe clean with a paper towel or soft cloth while still warm. Avoid washing with soap if possible (it removes the seasoning). If necessary, wash quickly with hot water and a stiff brush, then dry immediately and thoroughly. Lightly oil with a thin layer of vegetable oil after washing to prevent rust. Never put carbon steel in the dishwasher.
- Non-stick coated: Wash with warm soapy water and a soft sponge. Never use abrasive scouring pads or metal utensils (they will scratch the coating). Avoid harsh chemicals. Dishwasher safe on the top rack, but hand washing is recommended to extend the life of the coating.
- Dry thoroughly: After washing, dry trays thoroughly with a clean towel or allow to air dry fully before stacking or storing. This is especially important for carbon steel (which rusts easily) and aluminized steel (where moisture can cause the coating to degrade).
- Sanitize: For commercial bakeries, trays should be sanitized after washing, especially if they come into contact with ready-to-eat products. Use a food-grade sanitizer (chlorine bleach 50-100 ppm, quaternary ammonium 200-400 ppm, or hot water 77C/170F for 30 seconds). Allow to air dry after sanitizing.
- Clean perforated trays carefully: Perforated trays require extra attention to clean the holes. Use a soft brush or pipe cleaner to remove food particles from the holes. Soaking in warm soapy water helps loosen debris.
5.2 Seasoning (for Carbon Steel and Aluminum)
- Carbon steel: Must be seasoned before first use. Wash the tray with hot soapy water to remove the factory protective coating, dry thoroughly, then apply a thin layer of vegetable oil or shortening to the entire surface (inside and out). Place in a preheated 200C/400F oven for 1 hour, then turn off the oven and let the tray cool inside. Repeat 2-3 times for best results. Re-season periodically (every 3-6 months with heavy use) or when the non-stick patina starts to wear.
- Aluminum: While not strictly necessary, seasoning aluminum trays can improve their non-stick properties and extend their life. To season: wash and dry the tray, apply a thin layer of vegetable oil, and bake at 200C/400F for 1 hour. Let cool in the oven. Repeat as needed.
5.3 Storage
- Store in a dry, clean area: Store trays in a dry, clean storage area away from moisture, dust, and contaminants. Avoid storing trays near chemicals or cleaning supplies.
- Stack properly: Stack trays neatly to prevent warping and damage. For rimmed trays, stack them so the rims interlock (nested) to save space. For flat trays, use a tray rack or stack carefully with a layer of paper or cloth between trays to prevent scratching. Don't stack trays too high (more than 20-25 trays) - the weight can warp the trays at the bottom.
- Store carbon steel trays oiled: For carbon steel trays, apply a thin layer of oil before long-term storage to prevent rust. Wrap in paper or cloth to protect from dust and moisture.
- Don't store food on trays: Never store food on baking trays for long periods (more than a few hours). Transfer food to appropriate storage containers. Storing food on trays can cause staining, corrosion, and cross-contamination.
- Keep specialty trays separate: Store specialty trays (baguette, croissant, loaf pans, cake pans) separately from general-purpose trays to prevent damage and make them easy to find.
5.4 When to Replace Trays
Even with proper care, baking trays will eventually need to be replaced. Here are the signs that it's time to replace a tray:
- Warping: If the tray is warped or no longer flat, it will cause uneven baking and should be replaced. Warped trays can also rock on the oven rack, causing spills.
- Rust or corrosion: If the tray has rust spots or real corrosion (especially on the baking surface), it should be replaced. Rust can contaminate food and affect the taste and appearance of products.
- Deep scratches or dents: Deep scratches or dents can affect the tray's performance and make cleaning difficult. If the surface is noticeably damaged, replace the tray.
- Non-stick coating peeling: If the non-stick coating is peeling, chipping, or noticeably worn, the tray should be replaced. Peeling coating can contaminate food and cause sticking.
- Broken or bent rims: If the rim is broken or severely bent, the tray may not stack properly or fit in the oven/rack, and should be replaced.
- Persistent sticking: If products consistently stick to the tray despite proper greasing/parchment paper and cleaning, the tray's surface may be degraded and it should be replaced.
6. Price Comparison and Budgeting
| Material | Full-Size (18x26") | Half-Size (13x18") | GN 1/1 (530x325mm) | Lifespan |
|---|---|---|---|---|
| Aluminum (1.0mm) | $10-$18 | $8-$14 | $10-$16 | 3-5 years |
| Aluminum (1.5mm, heavy-duty) | $18-$30 | $14-$22 | $18-$28 | 5-10 years |
| Aluminized steel | $12-$22 | $10-$16 | $12-$20 | 3-7 years |
| Stainless steel (standard) | $30-$50 | $22-$38 | $30-$48 | 10-20+ years |
| Stainless steel (tri-ply with aluminum core) | $50-$80 | $38-$60 | $50-$75 | 15-25+ years |
| Carbon steel | $20-$35 | $15-$25 | $20-$32 | 10-30+ years (with care) |
| Non-stick coated (aluminum) | $15-$28 | $12-$20 | $15-$25 | 1-3 years (coating) |
Note: Prices are approximate and vary by brand, supplier, quantity (volume discounts are common for bulk purchases of 50+ trays), and current market conditions. Shipping costs are additional for online orders.
6.1 Budgeting Tips
- Buy in bulk: Most suppliers offer volume discounts for purchases of 50+ trays. If you need many trays, buying in bulk can save 10-30% compared to buying individual trays.
- Invest in quality: As our customer in Chicago learned, cheap trays are a false economy. Invest in quality trays (at least 1.0mm thick aluminum, preferably 1.2-1.5mm, with reinforced rims) from the start. They will last longer, produce better results, and save you money Over time.
- Consider total cost of ownership: When comparing tray options, consider the total cost of ownership over the tray's lifespan, not just the upfront price. A $30 stainless steel tray that lasts 15 years costs $2/year, while a $10 aluminum tray that lasts 3 years costs $3.33/year. The stainless steel tray is actually cheaper per year of use!
- Standardize: Using one standard tray size throughout your bakery allows you to buy in larger quantities (getting better volume discounts) and simplifies operations.
- Buy directly from manufacturers: Buying directly from manufacturers (like HNH Bakery Equipment) can save you money compared to buying through distributors or retailers, as there are fewer middlemen marking up the price.
- Budget for replacements: Plan to replace a portion of your trays each year (typically 10-20% of your total trays, depending on material and usage). Include this in your annual equipment budget.
7. Common Mistakes to Avoid
- Buying the cheapest trays available: The most common mistake. Cheap, thin trays warp, rust, dent, and need frequent replacement. They also produce inconsistent baking results. Invest in quality trays from the start.
- Using trays that are too thin: Trays thinner than 1.0mm are prone to warping at high temperatures. Choose trays that are at least 1.0mm thick, preferably 1.2-1.5mm for heavy-duty use.
- Not preheating trays (for certain products): For some products (like bread, pizza, and certain pastries), preheating the tray before adding the dough can improve crust quality and prevent sticking. Not preheating when needed can result in soggy bottoms or uneven baking.
- Overloading trays: Overloading trays with too much product or products that are too close together can cause uneven baking, sticking, and products merging together. Follow recommended spacing for each product type.
- Using metal utensils on non-stick or aluminum trays: Metal utensils (knives, spatulas, scrapers) scratch non-stick coatings and aluminum surfaces. Use plastic, silicone, or wooden utensils instead.
- Not drying trays properly after washing: Moisture left on trays (especially carbon steel and aluminized steel) can cause rust and corrosion. Dry trays thoroughly after washing and before stacking/storing.
- Stacking trays while still warm or wet: Stacking warm or wet trays can cause warping, sticking, and moisture buildup. Allow trays to cool and dry fully before stacking.
- Using the wrong tray type for the product: Using a solid tray for products that need a crisp crust (bread, baguettes) or a perforated tray for liquid batter products (cakes, custards) can produce poor results. Match the tray type to the product.
- Not replacing worn or damaged trays: Continuing to use warped, rusted, or damaged trays affects product quality and can be a food safety hazard. Replace trays at the first sign of notable wear or damage.
- Mixing allergen and non-allergen trays: If you make both allergen-containing and allergen-free products, use separate, clearly labeled trays for each to prevent cross-contact. Wash trays thoroughly between uses if they must be shared.
- Not Given tray weight when purchasing: Heavy trays (stainless steel) can cause employee fatigue and injury, especially for smaller or older employees. Consider the weight of full trays (tray + product) when choosing material and size.
8. How HNH Bakery Equipment Can Help
Every machine is tested before shipping, and we provide video call support for installation and troubleshooting. Our trays are designed for professional use, with attention to detail, durability, and consistent performance.
Our baking tray lineup includes:
- Aluminum baking trays: Food-grade 3003/5052 aluminum, 1.0-1.5mm thick, with reinforced rims for added strength and resistance to warping. Available in flat, rimmed, and perforated styles, in all standard sizes (full-size, half-size, quarter-size, GN 1/1, 600x400mm). Our most popular and affordable option.
- Aluminized steel baking trays: Steel core with aluminum-silicon coating, offering good heat distribution and durability at an affordable price. Available in flat, rimmed, and perforated styles, in all standard sizes.
- Stainless steel baking trays: Food-grade 304 stainless steel, with optional aluminum core (tri-ply) for improved heat distribution. Great durability, corrosion resistance, and hygiene. Available in flat and rimmed styles, in all standard sizes. The premium choice for high-end bakeries.
- Carbon steel baking trays: Traditional black/blue steel trays, perfect for artisan bread baking. Develops a natural non-stick patina with proper seasoning. Available in flat and rimmed styles.
- Specialty trays: Baguette trays (perforated, 2-6 slots), croissant trays (perforated, molded shapes), loaf pans (various sizes), cake pans (round, square, rectangular, springform), muffin tins (6, 12, 24 cup), tartlet tins, pizza pans, and cooling racks.
- Custom trays: We can manufacture custom sizes, shapes, and configurations to fit your specific oven, rack, or product requirements. Contact us to discuss your custom tray needs.
When you purchase baking trays from HNH Bakery Equipment, you receive:
- Factory-direct pricing: As a direct manufacturer, we offer prices that are 20-40% lower than comparable trays from distributors or retailers, without compromising on quality.
- Volume discounts: We offer real volume discounts for bulk purchases of 50+ trays. The more you buy, the more you save.
- Free consultation: Our bakery equipment specialists can help you figure out the right tray material, size, type, and quantity for your specific products, oven capacity, production volume, and budget. We can also help you calculate your exact tray needs.
- Professional packaging and shipping: We handle export packaging (trays are carefully packed to prevent damage during shipping) and can arrange shipping to your nearest port or deliver to your door (CIF/DDP terms available). We provide all necessary export documentation.
- Quality assurance: All our trays undergo strict quality control before shipping, including checkion for flatness, rim integrity, surface finish, and dimensional accuracy. We stand behind our products with a satisfaction guarantee.
- Fast turnaround: We maintain large inventories of standard trays for quick shipment. Custom orders typically ship within 2-4 weeks.
Talk to Our Bakery Equipment Specialists
Whether You're just starting out or looking to upgrade your existing line, we have the equipment and the expertise to help you succeed. Contact us for a free quote today.
Request Free Quote / Consultation9. Final Checklist: What to check Before Purchasing
- Material: Have I chosen the right material for my products and budget? (Aluminum for general-purpose, stainless steel for premium/durability, carbon steel for artisan bread, aluminized steel for middle ground.)
- Thickness: Are the trays at least 1.0mm thick? (Preferably 1.2-1.5mm for heavy-duty use to prevent warping.)
- Size: Have I verified that the trays fit my oven(s), rack(s), and proofer? Have I measured my equipment to confirm compatibility?
- Type: Have I chosen the right tray type for my products? (Flat for cookies/pastries, rimmed for general-purpose, perforated for bread/crisp crusts, non-stick for sticky products.)
- Quantity: Have I calculated how many trays I need from oven capacity, production volume, cycle time, proofing, cooling, and buffer? (Have I included a 20-30% buffer?)
- Rims: Do the trays have reinforced rims for added strength and stackability? (Reinforced rims prevent warping and make trays easier to handle.)
- Food-grade certification: Are the trays made from food-grade materials? (Look for FDA, LFGB, or other food-contact certification.)
- Brand and reputation: Have I studyed the manufacturer's reputation? Can they provide references from other bakeries? How long have they been in business?
- Price and total cost: Have I compared prices across multiple suppliers? Have I considered total cost of ownership (purchase price / lifespan = cost per year)? Have I factored in shipping, customs/duties, and volume discounts?
- Care and maintenance: Do I understand how to properly clean, season, store, and maintain the trays? Have I budgeted for replacements (10-20% per year)?
- Specialty trays: Do I need any specialty trays (baguette, croissant, loaf, cake, muffin, tartlet, pizza)? Have I included these in my order?
- Allergen management: If I make both allergen-containing and allergen-free products, do I have separate, clearly labeled trays for each?
- Sample testing: If possible, have I ordered a sample tray to test before placing a bulk order? (Testing a sample allows you to check quality, fit, and performance before committing to a large purchase.)
10. Conclusion
Baking trays are one of the most fundamental and necessary pieces of equipment in any bakery, yet they are often overlooked or treated as an afterthought. As our customer in Chicago learned, the quality of your baking trays directly affects the quality, consistency, and appearance of everything you bake. Cheap, flimsy trays produce cheap, inconsistent products and end up costing more Over time through replacements, wasted product, and frustrated customers.
When choosing baking trays, the most important factors are: material (aluminum for general-purpose, stainless steel for premium durability, carbon steel for artisan bread, aluminized steel for middle ground), thickness (at least 1.0mm, preferably 1.2-1.5mm to prevent warping), size (standard full-size or half-size that fits your oven and rack), type (flat, rimmed, perforated, non-stick, specialty), and quantity (calculated from your oven capacity, production volume, and cycle time, with a 20-30% buffer).
For most commercial bakeries, food-grade aluminum trays (1.0-1.5mm thick, with reinforced rims) are the best all-around choice Because of their Great heat conductivity, light weight, and affordability. If budget allows and you want the ultimate in durability and hygiene, stainless steel trays (preferably with an aluminum core for better heat distribution) are worth the investment - they can last 10-20+ years and may actually be cheaper per year of use than cheaper trays that need frequent replacement.
Proper care and maintenance will extend the life of your trays: wash after each use with appropriate cleaning methods for the material, dry thoroughly, season carbon steel and (optionally) aluminum trays, store in a dry clean area, stack properly, and replace trays at the first sign of notable wear, warping, rust, or damage.
Finally, invest in quality from the start. As our customer in Chicago discovered, buying cheap trays is a false economy - they cost more Over time through replacements, wasted product, and inconsistent quality. A good set of baking trays is an investment in your product quality and your bakery's reputation. Choose wisely, care for them properly, and they will serve you well for years to come.
Every machine is tested before shipping, and we provide video call support for installation and troubleshooting. Contact us for a free consultation - we would love to help you find the perfect trays for your bakery.
📋 Bakery Equipment Checklist
Download our complete bakery equipment checklist with budget estimates for 5 different bakery types.
Free Bakery Equipment Checklist →📋 Bakery Equipment ROI Calculator
Use our interactive ROI calculator to see how quickly your bakery equipment investment pays off.
Calculate Your Equipment ROI →📋 Bakery Equipment Maintenance Calendar
Get our printable maintenance calendar to keep your bakery equipment running at peak performance.
Printable Maintenance Calendar →📋 Bakery Equipment Energy Cost Calculator
Estimate your bakery equipment energy costs and find ways to reduce your utility bills.
Calculate Energy Costs →Related Articles
Learn More
- 👉 Bakery Equipment Selection Complete Guide: Choose by Output & Product
- 👉 Bakery Equipment Maintenance Schedule: Daily, Weekly, Monthly, Yearly
- 👉 Dough Divider Rounder Troubleshooting: 15 Common Problems & Solutions
- 👉 Small Bakery Equipment ROI & Payback Period Calculator
- 👉 Bakery Equipment Energy Consumption & Energy Saving Guide
- 👉 Bakery Equipment Food Safety & Hygiene Compliance Complete Guide