
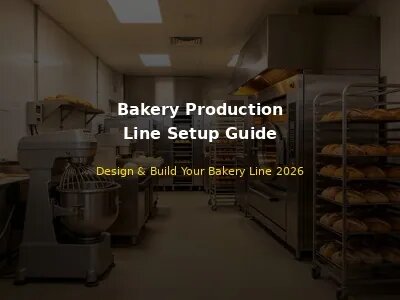
A story from our customer in Lagos, Nigeria: "When we set up our bakery production line, we made a classic mistake — we bought equipment first and then tried to figure out the layout. The result was a mess: the mixer was on one side of the room, the divider was on the other, and the oven was in a corner with no ventilation. Our staff were walking kilometers every day just moving dough around. After 6 months of struggling, we called HNH and they helped us redesign the entire layout. They moved equipment into a proper workflow, added proper ventilation, and even suggested a few equipment upgrades. Our production efficiency increased by 40% overnight. The lesson? Plan your layout before you buy equipment, not after."
Setting up a bakery production line is one of the most worth noting decisions you'll make as a bakery operator. A well-designed production line can increase efficiency by 30-50%, reduce labor costs, improve product consistency, and maximize your return on equipment investment. A poorly designed line, on the other hand, causes wasted movement, bottlenecks, inconsistent quality, and frustrated staff.
This complete guide walks you through every step of setting up a bakery production line — from initial planning and layout design to equipment selection, workflow optimization, capacity planning, and cost estimation. Whether you're starting a new bakery or upgrading an existing one, these principles will help you build an efficient, scalable production line that grows with your business.
1. Pre-Planning: Define Your Requirements
Before you buy any equipment or draw any layout, You should clearly define your production requirements. This foundation will guide every subsequent decision.
1.1 Define Your Product Mix
Start by listing all products you plan to produce and their expected volumes:
- Bread types: White bread, whole wheat, sourdough, rye, multigrain, specialty breads
- Pastries: Croissants, danishes, muffins, scones, cinnamon rolls
- Cakes: Sponge cakes, layer cakes, cupcakes, cheesecakes
- Cookies and biscuits: Drop cookies, cut-out cookies, sandwich cookies
- Specialty items: Bagels, pretzels, pizza dough, flatbreads
Different products require different equipment and production processes. A line improved for bread production will look quite different from one improved for pastries or cakes.
1.2 figure out Production Volume
Calculate your expected production volume For:
- Daily output: How many loaves/pastries/cakes per day?
- Peak volume: What's your maximum expected output during peak periods?
- Growth projections: How much do you expect volume to grow in 1-3 years?
- Shift pattern: Will you run one shift, two shifts, or 24-hour production?
Your production volume figure outs the size and capacity of every piece of equipment you need.
1.3 judge Your Space
- Total area: How many square meters/feet do You've?
- Ceiling height: Minimum 3 meters for most equipment, 4+ meters for rotary ovens and tall proofers
- Floor load capacity: Commercial equipment is heavy — ensure your floor can support the weight
- Utilities: What's available — three-phase electricity, gas, water, drainage, ventilation?
- Loading access: Can equipment be delivered and installed? Measure doorways, corridors, and elevators
1.4 Set Your Budget
figure out your total budget for the production line, including:
- Equipment purchase
- Installation and setup
- Utilities modification (electrical, gas, plumbing, ventilation)
- Training
- Initial ingredients and supplies
- Contingency (15-20% of total budget)
2. Bakery Production Line Workflow Design
A well-designed production line follows a linear, one-directional workflow. Each step flows naturally into the next, minimizing back-and-forth movement and wait times.
2.1 The Standard Bakery Production Workflow
| Step | Process | Equipment | Typical Time |
|---|---|---|---|
| 1 | Raw material storage | Storage racks, bins, refrigeration | N/A |
| 2 | Weighing & preparation | Scales, ingredient bins | 10-15 min/batch |
| 3 | Mixing | spiral dough mixer / planetary mixer | 10-20 min/batch |
| 4 | Bulk fermentation | Fermentation room / cabinet | 30-90 min |
| 5 | Dividing | dough portioning machine | 2-5 min/batch |
| 6 | Rounding | Dough rounder | 1-3 min/batch |
| 7 | Intermediate proofing | Intermediate proofer | 10-20 min |
| 8 | Shaping/moulding | Dough moulder, sheeter | 3-10 min/batch |
| 9 | Final proofing | Proofing cabinet / room | 45-90 min |
| 10 | Baking | rotary rack oven / deck oven / tunnel oven | 15-45 min/batch |
| 11 | Cooling | Cooling racks / cooling tunnel | 30-60 min |
| 12 | Packaging | Packaging machine / manual | 5-15 min/batch |
| 13 | Finished goods storage | Storage racks | N/A |
2.2 Workflow Design Principles
- One-directional flow: Raw materials enter at one end, finished products exit at the other. No backtracking.
- Minimize movement: Place equipment close enough that staff don't waste time walking, but far enough for safe operation.
- Balance capacity: Each step should have similar throughput to avoid bottlenecks. If your oven can bake 200 loaves/hour but your divider can only process 100 loaves/hour, the divider is your bottleneck.
- Separate raw and cooked: Keep raw dough preparation areas separate from baking and cooling areas to prevent cross-contamination.
- Wet and dry separation: Keep wet processes (mixing, washing) separate from dry processes (packaging, storage).
3. Equipment Selection Guide
Choosing the right equipment for your production line is important. Each piece of equipment should match your product types, production volume, and automation level.
3.1 Mixing Equipment
| Equipment | Best For | Capacity Range | Price Range (USD) |
|---|---|---|---|
| spiral dough mixer | Bread dough, high-volume production | 20-200 kg flour | $2,000-$15,000 |
| Planetary mixer | Cakes, creams, fillings, small batches | 10-80 liters | $1,500-$8,000 |
| Twin-arm mixer | Artisan bread, sourdough, delicate doughs | 30-150 kg | $5,000-$20,000 |
| Horizontal mixer | Quite high-volume industrial production | 100-500 kg | $10,000-$50,000 |
Recommendation: For most commercial bakeries, a spiral dough mixer is the best choice for bread dough. Choose a capacity that can handle your largest batch, but don't oversize — mixing too small a batch in a too-large mixer causes poor dough development.
3.2 Dividing and Rounding Equipment
| Equipment | Best For | Capacity Range | Price Range (USD) |
|---|---|---|---|
| Manual dough portioning machine | Small bakeries, low volume | 30-120 pieces/min | $500-$2,000 |
| Hydraulic dough cutting machine | Medium volume, consistent weight | 60-200 pieces/min | $2,000-$8,000 |
| Automatic divider rounder | High volume, continuous production | 100-500 pieces/min | $5,000-$25,000 |
| Fully automatic divider rounder | Industrial production, minimal labor | 200-1000 pieces/min | $15,000-$60,000 |
Important consideration: Dough weight range. Different products require different dough piece weights (30g for rolls, 500g for loaves, 1kg for large breads). Ensure your divider can handle the full range of weights you need.
3.3 Proofing Equipment
- Proofing cabinet: Temperature and humidity controlled cabinet for final proofing. Sizes range from 1-tray to 32-tray units. $1,000-$8,000.
- Proofing room: Walk-in room for high-volume proofing. Custom-built to your space. $5,000-$20,000+.
- Intermediate proofer: Conveyor-style proofer between rounding and shaping. Integrated into automatic lines. $3,000-$15,000.
- Retarder proofer: Combined refrigeration and proofing for delayed baking. Allows overnight proofing. $3,000-$12,000.
Tip: Proofing is often the bottleneck in bakery production. Ensure You've enough proofing capacity to match your oven capacity. A good rule of thumb: proofing capacity should be 2-3x your oven capacity, since proofing takes longer than baking.
3.4 Baking Equipment
| Equipment | Best For | Capacity Range | Price Range (USD) |
|---|---|---|---|
| Deck oven | Artisan bread, pizza, specialty products | 1-4 decks, 2-8 trays/deck | $3,000-$20,000 |
| rotary rack oven | High-volume bread, pastries, cookies | 16-64 trays per batch | $5,000-$30,000 |
| Convection oven | Pastries, cookies, cakes, roasting | 5-20 trays per batch | $2,000-$10,000 |
| Tunnel oven | Industrial continuous production | Custom length, continuous output | $20,000-$200,000+ |
Important considerations: Heat source (gas vs. electric vs. diesel), steam injection (for crusty breads), tray size compatibility, energy efficiency, and control system (manual vs. digital vs. programmable).
3.5 Shaping and Forming Equipment
- Dough moulder: Shapes dough into loaves, baguettes, or rolls. $2,000-$10,000.
- dough rolling machine: Rolls dough into thin sheets for croissants, pastries, pizza. $1,500-$8,000.
- Baguette moulder: Especially shapes long, thin baguettes. $2,000-$8,000.
- Toast moulder: Shapes dough for sandwich bread/toast loaves. $2,000-$8,000.
- Automatic filling/depositing machine: Fills pastries with cream, jam, or chocolate. $3,000-$15,000.
4. Layout Design Principles
A well-designed bakery layout maximizes efficiency, ensures safety, and creates a pleasant working environment. Here are the important principles to follow.
4.1 Space Allocation
| Area | % of Total Space | Important Requirements |
|---|---|---|
| Raw material storage | 15-20% | Dry storage, refrigeration, freezer, easy access |
| Mixing/preparation | 15-20% | Water, drainage, flour storage, mixing equipment |
| Production/shaping | 20-25% | Dividers, rounders, moulders, sheeters, worktables |
| Proofing | 10-15% | Temperature/humidity control, ventilation |
| Baking | 10-15% | Ovens, ventilation, heat resistance, gas/electric |
| Cooling/packaging | 10-15% | Cooling racks, packaging equipment, clean area |
| Walkways/utilities | 5-10% | Clear paths, utility access, maintenance space |
4.2 Layout Best Practices
- Linear flow: Arrange equipment in production order from raw materials to finished goods. This is the single most matters layout principle.
- U-shaped layout (alternative): If space is limited, a U-shaped layout can work — raw materials enter at one end of the U, production flows around the U, and finished goods exit at the other end. This allows staff to monitor multiple stations from a central point.
- Walkway width: Minimum 90cm for pedestrian walkways, 120cm for areas with trolley traffic, 150cm for main corridors.
- Equipment spacing: Leave 60-90cm between equipment for operation and cleaning. Leave 100cm+ behind equipment for maintenance access.
- Work triangle: For manual stations, arrange tools and materials within easy reach (the "work triangle" principle from kitchen design).
- Ventilation: Position ovens and mixers near ventilation hoods. Ensure adequate exhaust capacity to remove heat, steam, and flour dust.
- Lighting: Provide bright, even lighting throughout the production area. Task lighting at detailed workstations (shaping, decorating).
- Flooring: Use non-slip, easy-to-clean flooring (epoxy, quarry tile, or sealed concrete). Ensure proper drainage in wet areas.
- Walls and ceilings: Use smooth, washable, light-colored materials. Avoid ledges and crevices where dust and pests can accumulate.
Layout Design Tip: Use Tape to Mock Up Your Layout
Before installing any equipment, use masking tape to mark out the footprint of every piece of equipment on your floor. Include walkways, work areas, and storage spaces. Then walk through the entire production process with your team — pretend to mix, divide, round, shape, proof, bake, cool, and package. This exercise will reveal bottlenecks, tight spaces, and workflow issues before you spend a single dollar on installation. Many bakery owners tell us this saved them thousands of dollars in rework.
5. Capacity Planning and Bottleneck Analysis
Understanding your production capacity and spoting bottlenecks is needed for an efficient production line.
5.1 How to Calculate Capacity
- List all equipment and its throughput: For each piece of equipment, calculate how much product it can process per hour.
- spot the bottleneck: The equipment with the lowest throughput is your bottleneck. This figure outs your overall line capacity.
- Calculate daily capacity: Bottleneck throughput × production hours per day × efficiency reason (70-85%).
- Compare with demand: If your capacity exceeds demand, You've room to grow. If demand exceeds capacity, You should upgrade the bottleneck equipment.
5.2 Common Bottlenecks and Solutions
| Bottleneck | Symptoms | Solution |
|---|---|---|
| Oven capacity | Proofed products waiting to bake, oven running constantly | Add another oven, upgrade to larger oven, improve baking schedule |
| Proofing capacity | Shaped products waiting to proof, proofers always full | Add proofing cabinet, build proofing room, improve proofing times |
| Mixer capacity | Staff waiting for mixer, small batches throughout day | Upgrade to larger mixer, add second mixer, improve batch scheduling |
| Divider/rounder capacity | Dough waiting to be divided, manual dividing as backup | Upgrade to higher-capacity machine, add second machine, automate |
| Cooling capacity | Baked products piling up, no room for cooling | Add cooling racks, install cooling tunnel, improve cooling times |
| Labor shortage | Staff overworked, quality inconsistent, delays | Automate more processes, hire additional staff, improve workflow |
6. Cost Estimation and Budgeting
6.1 Production Line Cost by Scale
| Scale | Output (kg/hour) | Equipment Cost (USD) | Total Setup Cost (USD) | Best For |
|---|---|---|---|---|
| Small-scale | 20-50 | $10,000-$25,000 | $15,000-$40,000 | Small retail bakeries, cafes, startups |
| Medium-scale | 50-150 | $25,000-$70,000 | $40,000-$100,000 | Growing retail bakeries, wholesale operations |
| Large-scale | 150-500 | $70,000-$250,000 | $100,000-$350,000 | Industrial bakeries, large wholesale, export |
| Industrial | 500+ | $250,000+ | $350,000+ | Large-scale factories, national distribution |
6.2 Cost Breakdown
- Equipment: 60-70% of total budget. Mixers, dividers, rounders, proofers, ovens, cooling, shaping equipment.
- Installation: 10-15% Equipment delivery, positioning, connection to utilities, commissioning.
- Utilities modification: 5-10% Electrical upgrades, gas lines, plumbing, drainage, ventilation hoods.
- Facility preparation: 5-10% Flooring, walls, lighting, insulation, food-safe finishes.
- Training: 2-5% Staff training on equipment operation and maintenance.
- Contingency: 10-15% Unexpected costs, delays, changes.
6.3 Cost-Saving Tips
- Buy from direct manufacturers: Working directly with equipment manufacturers (like HNH) removes middleman markup and can save 20-40%.
- Start scalable: Choose equipment that can be upgraded or expanded. Start with a smaller line and add capacity as needed.
- Consider refurbished: For non-important equipment, refurbished can be a good option. Always check before buying.
- Bundle purchases: Buying a complete line from one supplier often qualifies for a package discount.
- Energy efficiency: Energy-efficient equipment costs more upfront but saves noticeably on utility bills over time.
- Plan for maintenance: Well-maintained equipment lasts longer and has fewer breakdowns. Budget for regular maintenance.
7. Utilities and Infrastructure Requirements
7.1 Electrical Requirements
- Most professional bakery machinery requires three-phase electricity (380V/400V, 50/60Hz)
- Small equipment may run on single-phase (220V/240V)
- Calculate total power demand: add up the wattage of all equipment, then add 20-30% for peak demand and future expansion
- Install dedicated circuits for high-power equipment (ovens, mixers)
- Ensure proper grounding and circuit protection
7.2 Gas Requirements
- Gas ovens require a dedicated gas line with proper pressure and capacity
- Calculate total gas demand from oven BTU ratings
- Install gas shutoff valves near each piece of gas equipment
- Ensure proper ventilation and carbon monoxide detection
- Gas installation must be done by a licensed professional
7.3 Water and Drainage
- Mixers, cleaning stations, and some ovens require water connections
- Install floor drains in mixing, cleaning, and washing areas
- Use grease traps for wastewater from cleaning areas
- Ensure adequate water pressure and flow rate
- Install backflow prevention devices
7.4 Ventilation and HVAC
- Ovens produce notable heat — install exhaust hoods with adequate CFM rating
- Mixing areas produce flour dust — install dust collection or adequate exhaust
- Proofing areas require humidity control — install humidifiers or steam injection
- Maintain comfortable working temperature (18-24°C) in non-baking areas
- Ensure make-up air supply matches exhaust volume to prevent negative pressure
8. Compliance and Food Safety
Your production line must comply with local food safety regulations and industry standards.
8.1 Important Compliance Areas
- Food safety certification: HACCP (Hazard Analysis and Important Control Points), ISO 22000, or local equivalent
- Health department permits: Food handling permit, bakery license, health checkion
- Fire safety: Fire suppression systems for ovens, fire extinguishers, emergency exits, smoke detectors
- Building codes: Structural load, egress, accessibility, zoning compliance
- Environmental regulations: Waste disposal, grease management, emissions, noise
- Employee safety: OSHA (or local equivalent) compliance, machine guarding, PPE, training
8.2 Food Safety Design Principles
- Separate raw and cooked: Physical separation between raw dough handling and baked product handling
- Easy to clean: Equipment with smooth, non-porous surfaces (stainless steel). No crevices or hard-to-reach areas.
- Hand washing stations: Multiple hand washing sinks with soap, paper towels, and hot water
- Color-coded tools: Different colored cutting boards, knives, and containers for different food types
- Pest control: Sealed doors and windows, pest traps, regular checkions
- Waste management: Covered waste bins, regular removal, separate recycling
- Temperature monitoring: Thermometers in refrigerators, freezers, proofers, and ovens. Regular logging.
9. Installation and Commissioning
9.1 Installation Process
- Site preparation: Complete flooring, walls, utilities, and ventilation before equipment arrives
- Equipment delivery: Ensure delivery access is adequate. Have equipment delivered to the installation location if possible
- Positioning: Place equipment according to your layout plan. Use a forklift or pallet jack for heavy equipment
- Leveling: Level all equipment using adjustable feet or shims. Uneven equipment causes vibration and premature wear
- Utility connections: Connect electricity, gas, water, and drainage. All connections must be done by licensed professionals
- Ventilation connection: Connect ovens and mixers to exhaust systems
- Initial testing: Power on each piece of equipment and test basic functions
- Commissioning: Run test batches through the entire production line to check everything works together
- Training: Train staff on equipment operation, cleaning, and maintenance
- Handover: Final checkion, sign-off, and documentation (manuals, warranties, service contacts)
9.2 Common Installation Pitfalls to Avoid
- Not measuring doorways and corridors before ordering equipment (equipment that won't fit through doors)
- Not checking floor load capacity (heavy equipment cracking floors)
- Not planning for utility connections (discovering you need a 3-phase power upgrade after equipment arrives)
- Not leaving enough maintenance space behind equipment (can't access motors or filters for servicing)
- Rushing the commissioning process (not running enough test batches to spot issues)
- Not training staff before production starts (equipment damage and safety issues from improper operation)
10. Maintenance and Long-Term Performance
A well-maintained production line lasts 10-20 years or more. Neglected equipment breaks down frequently, produces inconsistent quality, and can be dangerous to operate.
10.1 Maintenance Schedule
| Frequency | Tasks |
|---|---|
| Daily | Clean all equipment, check lubrication levels, check for wear, remove flour dust, clean filters, check temperature settings |
| Weekly | Deep clean ovens and mixers, check belt tension, check electrical connections, clean ventilation filters, calibrate thermometers |
| Monthly | Lubricate moving parts, check motors and bearings, check gas connections for leaks, test safety devices, look over maintenance logs |
| Quarterly | Professional checkion, replace worn belts and seals, calibrate oven temperature, check electrical panel, service ventilation system |
| Annually | Full equipment overhaul, replace major wear parts, professional cleaning, safety checkion, update maintenance plan |
10.2 Spare Parts Inventory
Keep important spare parts on hand to minimize downtime:
- Belts and chains
- Seals and gaskets
- Motors and relays
- Heating elements (for electric ovens)
- Thermostats and temperature sensors
- Cutting blades and knives
- Filters (air, oil, water)
Find the Right Equipment for Your Bakery
Ready to upgrade your bakery? Get in touch with our team for a free consultation. We will judge your needs and recommend the best equipment for your operation and budget.
Get Free Production Line Consultation →11. Conclusion: Build for Today, Plan for Tomorrow
Setting up a bakery production line is a complex process that requires careful planning, informed decisions, and attention to detail. But when done right, it creates a foundation for efficient, profitable, and scalable bakery operations.
Here's a quick summary of the important takeaways:
- Plan before you buy: Define your product mix, production volume, space, and budget before purchasing any equipment. Use tape to mock up your layout.
- Design for workflow: Arrange equipment in a linear, one-directional flow from raw materials to finished products. Minimize movement and remove bottlenecks.
- Choose the right equipment: Match equipment to your product types, volume, and automation level. Don't oversize or undersize. Choose scalable equipment that can grow with your business.
- Allocate space wisely: Follow recommended space allocation percentages. Ensure adequate walkways, maintenance access, and utility connections.
- Plan for utilities: Ensure adequate electrical, gas, water, drainage, and ventilation capacity. Budget for utility modifications.
- Comply with regulations: Meet food safety, fire safety, building code, and environmental requirements from the start.
- Invest in maintenance: Create a maintenance schedule, keep spare parts on hand, and train staff on proper equipment care.
- Work with experts: Consult with equipment manufacturers, bakery design professionals, and experienced bakery owners. Their expertise can save you time, money, and headaches.
keep in mind that your production line is not a one-time investment — it's a long-term asset that should grow and evolve with your business. Design it with flexibility and scalability in mind, and you'll be able to adapt to changing market demands, add new products, and increase production capacity without starting from scratch.
With careful planning, the right equipment, and a well-designed layout, your bakery production line can be the engine that drives your business growth for years to come.
📋 bakery machinery Checklist
Download our complete bakery machinery checklist with budget estimates for 5 different bakery types.
Free bakery machinery Checklist →📋 baking equipment ROI Calculator
Use our interactive ROI calculator to see how quickly your baking equipment investment pays off.
Calculate Your Equipment ROI →📋 bakery machinery Maintenance Calendar
Get our printable maintenance calendar to keep your bakery machinery running at peak performance.
Printable Maintenance Calendar →📋 bakery machinery Energy Cost Calculator
Estimate your bakery machinery energy costs and find ways to reduce your utility bills.
Calculate Energy Costs →Related Articles
Recommended Reading
Real Customer Case: Bakery in Sri Lanka
Results: Production increased from 800 to 2,500 pieces/day (+212%). Labor reduced from 5 to 2 workers. Weight accuracy improved from ±10g to ±2g. ROI achieved in approximately 8 months.
"The dough portioning machine rounder alone saved us 3 workers and paid for itself in months." — bakery operator, Sri Lanka
Learn More
- 👉 baking equipment Selection Complete Guide: Choose by Output & Product
- 👉 baking equipment Maintenance Schedule: Daily, Weekly, Monthly, Yearly
- 👉 dough portioning machine Rounder Troubleshooting: 15 Common Problems & Solutions
- 👉 Small Bakery Equipment ROI & Payback Period Calculator
- 👉 Bakery Equipment Energy Consumption & Energy Saving Guide
- 👉 Bakery Equipment Food Safety & Hygiene Compliance Complete Guide