
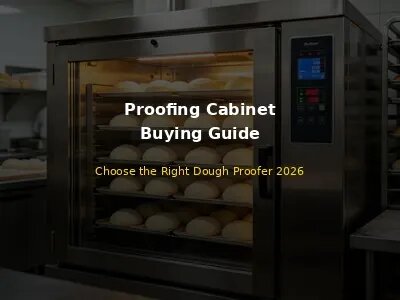
A story from our customer in Toronto, Canada: "We were proofing our bread dough on racks in a corner of the kitchen, covered with plastic sheets. On hot summer days, the dough would over-proof and collapse — we'd lose entire batches. On cold winter days, it would barely rise — we'd wait 3 hours and the dough was still flat. It was a constant battle, and our bread quality was all over the place. We finally bought a 36-tray roll-in proofing cabinet for $6,500. Best investment we ever made. Now every batch proofs perfectly — consistent temperature, consistent humidity, consistent results. Our bread quality improved by a lot, waste dropped from 8% to under 2%, and we no longer stress about the weather. The proofer paid for itself in 5 months through waste reduction alone. If you're still proofing dough at room temperature, do yourself a favor and get a proper proofing cabinet. It will change your business."
A proofing cabinet is one of the most a priority pieces of equipment in any bakery that produces yeast-leavened products. It provides the controlled temperature and humidity environment that dough needs to rise consistently and perfectly. Without a proofer, you're at the mercy of ambient conditions — hot days cause over-proofing, cold days cause under-proofing, and dry air causes skin formation that ruins your dough.
There's a common misconception in the bakery industry that more expensive = better. After installing equipment in 27 countries, we can tell you that's simply not true.
1. What Is a Proofing Cabinet and Do You Need One?
A commercial proofing cabinet (also called a dough proofer, proofing box, fermentation cabinet, or prover) is an enclosed, temperature- and humidity-controlled environment designed to provide ideal conditions for dough fermentation and rising. It maintains a consistent temperature (typically 25-40°C / 77-104°F) and humidity level (typically 70-90% RH) to allow yeast to ferment dough evenly and consistently.
1.1 How a Proofing Cabinet Works
A proofing cabinet works by:
- Heating: Electric heating elements warm the interior air to the set temperature (usually 25-40°C).
- Humidifying: A water reservoir or steam generator adds moisture to the air to maintain the set humidity level (usually 70-90% RH).
- Circulating: A fan circulates the warm, moist air evenly throughout the cabinet, ensuring consistent conditions on every tray.
- Controlling: A thermostat and humidistat (or digital controller) monitor and maintain the set temperature and humidity, turning heating and humidification on and off as needed.
1.2 Benefits of a Proofing Cabinet
| Benefit | Description | Impact |
|---|---|---|
| Consistent proofing | Every batch proofs at the same temperature and humidity, regardless of ambient conditions | Consistent product quality, reduced waste |
| Faster production | Optimal temperature speeds up fermentation, reducing proofing time by 20-50% | Higher throughput, shorter production cycles |
| Reduced waste | No more over-proofed or under-proofed dough from temperature fluctuations | 5-10% reduction in ingredient waste |
| Better product quality | Consistent fermentation produces better flavor, texture, and appearance | Higher customer satisfaction, premium pricing |
| Labor savings | No need to monitor and adjust proofing conditions manually | 1-2 hours/day labor savings |
| Space efficiency | Vertical storage uses floor space efficiently — 36 trays in a 1m² footprint | More production in less space |
| Weather independence | Proofing is consistent year-round, regardless of summer heat or winter cold | No seasonal quality variations |
| Food safety | Controlled temperature prevents dough from entering the danger zone (4-60°C) for too long | Reduced food safety risk |
1.3 Do You Need a Proofing Cabinet?
You surely need a proofing cabinet if:
- You produce more than 20-30 kg of yeast-leavened dough per day (bread, buns, rolls, croissants, danishes, sweet doughs)
- You struggle with inconsistent proofing — dough rises too fast on hot days, too slow on cold days
- You've large waste from over-proofed or under-proofed dough
- You want to improve product consistency and quality
- You've limited floor space and need vertical storage for proofing dough
- You plan to grow production and need scalable proofing capacity
You can not need a proofing cabinet if:
- You make less than 10-20 kg of yeast-leavened dough per day — a simple proofing box or warm room may suffice
- You only make products that don't require yeast proofing (cookies, cakes, pies, chemically-leavened pastries)
- You've a dedicated, naturally consistent proofing room with stable temperature and humidity
Expert Tip: Start Small, Scale Up
If you're a small bakery or start-up unsure about your long-term proofing needs, start with a compact under-counter or small reach-in proofer ($1,000-$3,000). It will handle most small to medium production needs, and if you outgrow it, You can always add a larger roll-in model later. The small proofer can then be used for small-batch or specialty products. Many bakeries keep both — a large roll-in for main production and a small reach-in for testing new recipes or small batches.
2. Types of Proofing Cabinets
Commercial proofing cabinets come in several types, each suited for different bakery sizes, production volumes, and space constraints.
2.1 Type Comparison Table
| Type | Capacity (trays) | Price Range | Best For |
|---|---|---|---|
| Countertop proofing box | 2-6 | $200-$1,000 | Tiny ops, home bakers, testing |
| Under-counter | 4-8 | $1,000-$3,000 | Small bakeries, cafes, limited space |
| Reach-in (single door) | 8-18 | $2,000-$5,000 | Small to medium bakeries, most common |
| Reach-in (double door) | 18-36 | $4,000-$8,000 | Medium bakeries, higher volume |
| Roll-in | 36-80+ | $4,000-$15,000 | Medium to large bakeries, batch production |
| Pass-through | 16-40 | $5,000-$12,000 | Linear workflow, high-volume, food safety |
| Proofing/retarder combo | 8-36 | $5,000-$15,000 | Overnight retarding, artisan bread, sourdough |
| Walk-in proofing room | 100+ | $10,000-$50,000+ | Large industrial bakeries |
2.2 Reach-In Proofing Cabinets (Most Common)
Reach-in proofing cabinets are the most common type, similar in size to a commercial refrigerator with shelves or tray slides inside. They're available in single-door (8-18 trays) and double-door (18-36 trays) configurations.
Advantages:
- Versatile — fits standard 1/1 size sheet pans (60×40cm)
- Good capacity for small to medium bakeries
- Easy access — open door and reach in to grab trays
- Available in various sizes to match production needs
- Affordable — $2,000-$8,000
- Easy to install — just plug in and connect water (if needed)
Disadvantages:
- Door opening causes temperature and humidity loss — each door opening can drop temperature by 2-5°C
- Loading/unloading is manual — must place each tray individually
- Takes up floor space — 70-140cm wide × 70-80cm deep
- Limited capacity compared to roll-in models
2.3 Roll-In Proofing Cabinets (High Volume)
Roll-in proofing cabinets are large units designed to accommodate a full rolling rack (trolley) of dough, which is rolled in and out through a large door. They're ideal for high-volume batch production.
Advantages:
- Quite high capacity — 36-80+ trays in a single rack
- Easy loading/unloading — roll the entire rack in/out, no need to handle individual trays
- Minimal temperature/humidity loss during loading — door is open for seconds, not minutes
- Efficient for batch production — prepare an entire rack of dough, roll it in, proof, then roll it straight to the oven
- Compatible with standard bakery rack trolleys (usually 60×40cm trays, 36-40 tiers)
Disadvantages:
- Large footprint — 90-140cm wide × 80-100cm deep, plus space for rack maneuvering
- Higher price — $4,000-$15,000
- Requires compatible rolling racks (additional cost if not already owned)
- Needs space for rack maneuvering — at least 1m clearance in front of the door
- Less flexible for small batches — you're proofing an entire rack at once
2.4 Pass-Through Proofing Cabinets (Linear Workflow)
Pass-through proofing cabinets have doors on both sides, allowing dough to be loaded from the prep area side and unloaded from the oven area side. They're ideal for bakeries with a linear workflow (prep → proof → bake).
Advantages:
- Efficient workflow — dough moves in a straight line from prep to proof to bake, no backtracking
- Reduces cross-traffic in the kitchen — prep staff and oven staff don't need to cross paths
- Better temperature/humidity retention — only one door is opened at a time
- Food safety — separates raw dough area from cooked/baked area, reducing cross-contamination risk
- Can improve production speed — dough is always ready at the oven side when needed
Disadvantages:
- Large footprint — deeper than standard models (100-150cm deep)
- Higher price — $5,000-$12,000
- Requires specific kitchen layout — prep area on one side, oven area on the other
- Less flexible — can't be repositioned easily if your layout changes
2.5 Proofing/Retarder Combination Units (Overnight Retarding)
Proofing/retarder combination units combine proofing (warm) and refrigeration (cold/retarding) in one cabinet, with programmable cycles that can automatically switch from retarder to proofer. They're core for bakeries doing overnight retarding (slow, cold fermentation) for artisan bread, sourdough, and croissants.
Advantages:
- Combines two functions in one unit — saves space and money vs. buying separate proofer and retarder
- Programmable overnight cycles — set it to retard (cold) overnight, then automatically switch to proofing (warm) in the morning, so dough is perfectly proofed when you arrive
- Enables slow fermentation — cold retarding develops better flavor, better crust, and longer shelf life
- Flexible production — You can prepare dough the day before and have it ready to bake first thing in the morning
- Better work-life balance — no need to come in at 3am to start dough
Disadvantages:
- Higher price — $5,000-$15,000
- More complex — both heating and cooling systems, more things to maintain
- Higher energy use — refrigeration uses more energy than heating alone
- More maintenance — compressor, refrigerant, defrost cycles, etc.
- May not be needed if you don't do overnight retarding
3. Choosing the Right Size and Capacity
Choosing the right size proofing cabinet is important — too small and it bottlenecks production, too large and it wastes money, space, and energy.
3.1 How to Calculate Your Capacity Needs
- List all yeast-leavened products: Bread loaves, buns, rolls, croissants, danishes, sweet rolls, pizza dough, etc.
- Calculate daily production per product: Number of units × dough weight per unit = kg/day per product.
- Calculate total daily dough volume: Add up all products to get total kg of dough per day.
- Convert to trays: A standard 1/1 sheet pan (60×40cm) holds approximately: 2-3 kg of bread dough (6-12 rolls or 2-3 loaves), 1-2 kg of pastry dough (12-24 croissants or danishes). So 100 kg of bread dough ≈ 35-50 trays; 100 kg of pastry dough ≈ 50-100 trays.
- Account for multiple proofing cycles per day: If you proof 2-3 batches per day, You can not need capacity for all dough at once — but having extra capacity allows you to proof everything at once if needed.
- Add growth buffer: Choose a proofer with 30-50% more capacity than your current needs to allow for growth.
3.2 Capacity Recommendations by Bakery Size
| Bakery Size | Daily Dough Volume | Recommended Capacity | Type |
|---|---|---|---|
| Micro (home/cottage) | Under 10 kg | 2-6 trays | Countertop box |
| Small (cafe/pastry shop) | 10-50 kg | 8-18 trays | Under-counter or single-door reach-in |
| Medium (retail bakery) | 50-200 kg | 18-36 trays | Double-door reach-in or small roll-in |
| Large (wholesale/commercial) | 200-500 kg | 36-80 trays | Roll-in (single or multiple) |
| Industrial | 500+ kg | 100+ trays | Multiple roll-ins or walk-in room |
3.3 Tray Size Compatibility
Make sure the proofing cabinet is compatible with your existing trays and racks:
- Standard 1/1 sheet pan: 60×40cm (24×16 inches) — most common in commercial bakeries. Most proofing cabinets are designed for this size.
- 1/2 sheet pan: 30×40cm (12×16 inches) — common in smaller operations. Some under-counter models use this size.
- Full-size hotel pan: 53×33cm (21×13 inches) — common in foodservice, less common in bakeries.
- Custom sizes: Some bakeries use custom tray sizes — make sure the proofer can accommodate them, or choose adjustable tray slides.
For roll-in models, check that your rolling rack trolley fits inside the cabinet. Standard rack dimensions are usually 60×40cm footprint, 180-200cm high, with 36-40 tray tiers. But rack dimensions can vary by manufacturer — measure your rack carefully before buying.
3.4 Physical Dimensions and Space
Measure your available space carefully before buying:
- Footprint: Reach-in: 70-140cm wide × 70-80cm deep. Roll-in: 90-140cm wide × 80-100cm deep. Pass-through: 90-140cm wide × 100-150cm deep.
- Height: Most units are 180-220cm high. Measure your ceiling height — leave at least 10cm clearance above the unit for ventilation.
- Door swing: The door needs room to swing open. Most doors swing 90-180 degrees. Leave at least 1m clearance in front of the door for loading/unloading.
- Doorways: Measure all doorways and hallways the unit must pass through during installation. Some large units may not fit through standard doors. Some models have removable doors or fold-down designs for easier installation.
- Ventilation: Leave at least 10cm clearance on all sides for air circulation. Don't push the unit against a wall or crowd it with other equipment — this can cause overheating and reduce efficiency.
- Floor: The unit should be on a stable, level, non-slip floor. Concrete or commercial tile is best. Use a floor drain nearby if possible for condensation runoff.
- Power: Check electrical requirements — most units need a standard 220V outlet, but larger units may need a dedicated 220V/380V circuit. Check the amperage and ensure your electrical system can handle it.
- Water: If your proofer has a steam humidifier, it needs a water supply connection (1/4" or 3/8" water line) and possibly a drain. Check if your chosen location has access to water and drain.
4. Temperature and Humidity Control
The most important feature of a proofing cabinet is its ability to maintain consistent temperature and humidity. Poor control causes inconsistent product quality and waste.
4.1 Ideal Proofing Conditions by Product
| Product | Temperature | Humidity | Proofing Time |
|---|---|---|---|
| White bread (loaves) | 28-32°C (82-90°F) | 75-85% RH | 45-90 min |
| Whole wheat bread | 30-35°C (86-95°F) | 80-85% RH | 60-120 min |
| Buns/rolls | 30-34°C (86-93°F) | 75-85% RH | 30-60 min |
| Sweet dough/rich dough | 26-30°C (79-86°F) | 75-85% RH | 45-75 min |
| Croissants/laminated | 25-28°C (77-82°F) | 70-80% RH | 60-120 min |
| Danishes/pastries | 26-29°C (79-84°F) | 75-80% RH | 45-90 min |
| Sourdough (artisan) | 24-28°C (75-82°F) | 75-80% RH | 2-4 hours (or overnight retard) |
| Pizza dough | 28-32°C (82-90°F) | 70-80% RH | 30-60 min |
| Bagels | 27-30°C (81-86°F) | 75-80% RH | 30-60 min |
4.2 Important Control Features to Look For
- Digital temperature control: Digital controllers with LED or LCD displays are more precise and easier to read than analog dials. Look for 0.1°C resolution and ±0.5°C accuracy.
- Digital humidity control: Digital humidistat with 1% RH resolution and ±3-5% RH accuracy. Analog humidity controls are less precise and harder to adjust.
- Programmable recipes/settings: The ability to store multiple temperature/humidity presets for different products. This saves time and ensures consistency — just select the "croissant" setting and the proofer automatically sets 27°C / 75% RH. Look for at least 5-10 programmable presets.
- Temperature range: Look for Various at least 20-45°C (68-113°F). This covers all standard proofing needs. Some units go up to 50°C+ for faster proofing, but be cautious — above 43°C can kill yeast.
- Humidity range: Look for Various at least 60-95% RH. This covers all standard proofing needs. Some units can reach 98% RH for high-hydration doughs.
- Uniform air circulation: A circulation fan ensures even temperature and humidity throughout the cabinet — no hot spots or dry spots. Look for a fan with multiple speed settings.
- Quick recovery: After the door is opened, the cabinet should recover to set temperature and humidity within 2-5 minutes. Good insulation, efficient heating, and a powerful humidifier help with quick recovery.
- Temperature/humidity display: A clear display showing both set and actual temperature and humidity. This allows you to check that the cabinet is performing correctly.
- Alarm/warning system: Audible and/or visual alarms if temperature or humidity goes outside the set range. This alerts you to problems (door left open, heating part failure, water empty) before they ruin a batch of dough.
- USB data logging (high-end): Some premium models can log temperature and humidity data to a USB drive for quality control and food safety records. This is useful for HACCP compliance and look overs.
- Delayed start / timer: The ability to set the proofer to turn on at a specific time. This allows you to load dough the night before and have it start proofing early in the morning, so it's ready when you arrive.
4.3 Humidification Systems
There are two main types of humidification systems in proofing cabinets:
| Type | How It Works | Pros | Cons |
|---|---|---|---|
| Steam/evaporative | Heating part boils water in a reservoir, creating steam that humidifies the air | Simple, reliable, low cost, easy to clean, no water line needed (manual fill) | Can cause temperature spikes, mineral buildup from hard water, needs regular refilling, less precise humidity control |
| Ultrasonic | Ultrasonic transducer vibrates water to create a fine mist that humidifies the air | Quite precise humidity control, no temperature increase, quiet, energy efficient, fast response | More expensive, needs water line connection, mineral buildup on transducer, more complex maintenance |
For most bakeries, a steam/evaporative humidifier is sufficient and more affordable. If you need quite precise humidity control or have hard water issues, an ultrasonic system may be worth the extra cost. Regardless of type, use filtered or softened water to reduce mineral buildup and extend the life of the humidifier.
Pro Tip: check Accuracy Regularly
Don't trust the proofer's built-in display — calibrate it regularly with a separate, calibrated thermometer and hygrometer. Place the reference device in the center of the cabinet, close the door, and wait 15-20 minutes for stabilization. Compare the readings. If the difference is more than ±1°C or ±5% RH, recalibrate the controller following the manufacturer's instructions. Do this monthly — sensors can drift over time, causing inconsistent proofing without you noticing.
5. Energy Efficiency
Proofing cabinets run for many hours each day, so energy efficiency has a meaningful impact on operating costs. An energy-efficient proofer can save $200-$1,000/year in electricity costs compared to an inefficient model.
5.1 Energy-Saving Features to Look For
- Thick insulation: Look for at least 50mm (2 inches) of polyurethane or foam insulation in the walls, ceiling, and door. Better insulation reduces heat loss and lowers energy use. The exterior walls should be close to room temperature when the unit is running — if they feel warm, insulation is inadequate.
- Door seals/gaskets: High-quality magnetic door seals that create an airtight closure. Poor seals let warm, moist air escape, forcing the heating and humidification systems to work harder. Check seals regularly and replace if damaged.
- Efficient heating elements: Sheathed electric heating elements with finned heat exchangers transfer heat more efficiently than bare elements. Look for elements with a high energy reason.
- Variable speed fan: A fan with multiple speed settings or variable speed control uses less energy than a single-speed fan running at full power constantly. The fan can run at low speed for maintenance and high speed for recovery.
- Digital controls with PID: PID (Proportional-Integral-Derivative) controllers maintain temperature more precisely than simple on/off controllers, reducing energy waste from overshooting and cycling. They also provide more consistent proofing.
- Automatic shut-off / standby: Some units have an energy-saving standby mode that reduces heating and fan speed when the door is closed and temperature is stable. A timer that turns the unit off after a set period can also save energy.
- LED interior lighting: LED lights use 75% less energy than incandescent or fluorescent lights and last much longer. If the proofer has interior lighting, make sure it's LED.
- Double-pane glass door: If the proofer has a glass door (for viewing dough without opening), double-pane or insulated glass reduces heat loss compared to single-pane glass.
- Water-efficient humidifier: Ultrasonic humidifiers use less water and energy than steam humidifiers. If using a steam humidifier, look for one with a water level sensor that only heats when needed.
5.2 Energy-Saving Usage Tips
- Don't oversize: A proofer that's much larger than your needs wastes energy heating and humidifying empty space. Choose the right size for your production.
- Load efficiently: Fill the proofer as much as possible before running it — a full proofer uses only slightly more energy than an empty one, but produces much more product.
- Minimize door openings: Every door opening loses heat and humidity. Plan your loading/unloading to minimize door openings. Use a glass door (if available) to check dough without opening.
- Turn off when not in use: Don't leave the proofer running 24/7 if you only proof during certain hours. Turn it off between batches or overnight. Use a timer or delayed start to have it ready when needed.
- Keep it clean: Clean heating elements, fans, and sensors regularly — dust and flour buildup reduce efficiency and cause the unit to work harder.
- Maintain seals: Check door seals regularly and replace if damaged. A 1cm gap in a door seal can increase energy use by 10-15%.
- Place in a cool, well-ventilated area: Don't place the proofer next to an oven or other heat source — it will have to work harder to maintain temperature. Ensure good ventilation around the unit for efficient operation.
- Use off-peak electricity: If your utility offers time-of-use rates, run the proofer during off-peak hours (nights/weekends) when electricity is cheaper. Use delayed start to schedule proofing for off-peak times.
6. Safety Features
While proofing cabinets are generally safe (they operate at relatively low temperatures), they still have electrical heating elements and moving fans that require proper safety features.
6.1 a must Safety Features
- Overheat protection: A thermostat or thermal fuse that automatically cuts power to the heating part if temperature exceeds a safe limit (usually 50-60°C). This prevents fire hazards from malfunctioning controllers or stuck relays.
- Ground fault circuit interrupter (GFCI): For units with water connections, a GFCI plug or built-in GFCI protects against electric shock in case of water contact with electrical components.
- Proper grounding: The unit should have a 3-prong grounded plug and proper internal grounding. Never use an adapter to bypass the ground pin.
- Fan guard: The circulation fan should have a protective guard to prevent fingers or objects from contacting the moving blades.
- Cool-touch exterior: The exterior surfaces (door, walls, top) should remain at safe temperatures (below 40°C / 104°F) to prevent burns. Good insulation ensures the exterior stays cool.
- Safe door handle: The door handle should stay cool to the touch and be easy to grip. Avoid metal handles that can conduct heat and cause burns.
- Electrical certification: Look for CE, UL, ETL, or other relevant electrical safety certifications. This indicates the unit has been tested and meets safety standards.
- IP rating: Look for an IP (Ingress Protection) rating of at least IP44 for use in wet bakery environments. This protects against dust and water splashes.
- Emergency shut-off: An easily accessible power switch or unplug option to quickly shut down the unit in case of emergency.
- Water overflow protection: For units with water reservoirs, an overflow drain or water level sensor prevents water from spilling onto the floor (creating a slip hazard) or onto electrical components.
6.2 Safe Usage Practices
- Always place the unit on a stable, level surface — never on an unstable table or cart.
- Keep the unit away from water sources (sinks, sprayers) to prevent electrical hazards.
- Don't overload the unit — follow the manufacturer's maximum load capacity.
- Don't block air vents or fans — maintain proper clearance around the unit.
- Unplug the unit before cleaning or servicing (except for daily exterior wiping).
- Don't use abrasive cleaners or water jets on electrical components.
- Keep the area around the unit clean and dry — wipe up spills immediately to prevent slips.
- Train all staff on proper use and safety procedures.
- If you notice unusual smells, smoke, sparks, or electrical issues, unplug the unit immediately and call a service technician.
7. Construction and Durability
A proofing cabinet should last 10-15 years or more with proper maintenance. Construction quality and materials figure out durability and ease of cleaning.
7.1 Construction Features to Look For
- Stainless steel construction: All food contact surfaces (interior walls, ceiling, floor, tray slides, door liner) should be made of food-grade stainless steel (304 grade). Stainless steel is durable, easy to clean, rust-resistant, and food-safe. The exterior should preferably also be stainless steel — it's more durable and easier to clean than painted steel.
- Thick insulation: At least 50mm (2 inches) of polyurethane or CFC-free foam insulation. Thick insulation ensures temperature stability, energy efficiency, and cool exterior surfaces.
- Heavy-duty door: The door should be solid, well-insulated, and have reinforced hinges that can withstand frequent opening and closing. Look for doors with a steel frame and insulated core.
- Quality door seals: Magnetic silicone or rubber gaskets that create an airtight seal. They should be removable for easy cleaning and replacement. Avoid glued-on seals that are hard to replace.
- Adjustable tray slides: Tray slides that can be adjusted to different heights to accommodate different tray sizes and product heights. Look for slides made of stainless steel or durable plastic that won't rust or break.
- Reinforced base: The base should be reinforced to support the weight of full trays of dough (a 36-tray unit can hold 100+ kg of dough). Look for a reinforced stainless steel base with adjustable leveling legs.
- Adjustable leveling legs: Legs that can be adjusted to level the unit on uneven floors. This ensures proper door closure and stable operation.
- Quality hinges and handles: Heavy-duty hinges that can withstand thousands of door openings. Cool-touch handles that are comfortable and safe to grip.
- Removable components: Tray slides, water reservoirs, humidifier components, and fans should be removable for easy cleaning and maintenance.
- Welded or sealed joints: Interior joints should be welded or sealed to prevent food and moisture from getting into crevices (which can harbor bacteria and mold).
7.2 Materials to Avoid
- Painted steel interior: Paint can chip, peel, and flake into food. It's also harder to clean and can rust if scratched. Avoid units with painted interiors.
- Aluminum interior: Aluminum is less durable than stainless steel and can react with acidic foods. It's also more prone to dents and scratches.
- Thin gauge steel: Thin steel dents easily and doesn't provide structural rigidity. Look for at least 0.8-1.0mm gauge stainless steel for interior and exterior panels.
- Fiberglass insulation: Fiberglass can absorb moisture and degrade over time. Polyurethane foam insulation is better — it's more durable, moisture-resistant, and provides better insulation per mm.
- Cheap plastic components: Low-quality plastic tray slides, handles, and controls can break easily, especially in warm, humid environments. Look for food-grade, heat-resistant plastics (like polypropylene or ABS) or stainless steel components.
8. Brands and Manufacturers
8.1 Premium European Brands
| Brand | Country | Price Range | Reputation |
|---|---|---|---|
| Rational | Germany | $8,000-$30,000+ | Industry leader, most innovative, extensive feature set, global service network, premium price |
| Wiesheu | Germany | $6,000-$25,000 | Premium quality, strong in bakery sector, reliable, good service |
| Miwe | Germany | $5,000-$20,000 | Well-regarded, bakery-focused, good quality, innovative features |
| Wachtel | Germany | $5,000-$18,000 | Solid German engineering, reliable, good value for premium segment |
| Wiesheu (Dibas) | Germany | $4,000-$15,000 | Mid-premium, good quality, strong in European market |
| Sveba Dahlen | Sweden | $5,000-$20,000 | Scandinavian quality, energy efficient, reliable, good service |
8.2 Mid-Range and Value Brands
| Brand | Country | Price Range | Reputation |
|---|---|---|---|
| HNH Bakery Equipment | China | $1,500-$10,000 | Great value, commercial-grade quality, direct from manufacturer, customizable, good after-sales support, all-stainless construction |
| Unox | Italy | $3,000-$12,000 | Good quality, innovative, strong in combi ovens and proofers, reasonable price |
| Moretti Forni | Italy | $3,000-$10,000 | Reliable, bakery-focused, stylish design, good value |
| Zanolli | Italy | $2,000-$8,000 | Decent quality, budget-friendly, good for small to medium bakeries |
| Omcan | Canada/China | $1,500-$6,000 | Value-oriented, decent quality for price, good warranty, North American service |
| Globe | USA | $2,000-$7,000 | Reliable, good for small to medium bakeries, US-based service and support |
| Avantco | USA/China | $1,000-$4,000 | Budget-friendly, entry-level, good for small operations, limited features |
| Bakemax | USA/China | $1,500-$5,000 | Good value, bakery-focused, decent quality, reasonable warranty |
Brand Selection Advice
Premium European brands (Rational, Miwe, Wachtel) offer the highest quality, most features, and best global service, but cost 2-3 times more. For most small to medium bakeries, mid-range brands (HNH, Unox, Moretti Forni, Omcan) offer Great value — commercial-grade quality, reliable performance, and good after-sales support at a fraction of the price. The important is to choose a brand with: (1) all-stainless-steel construction, (2) precise digital temperature/humidity control, (3) good warranty (minimum 1 year, preferably 2-3 years), (4) available spare parts in your country, (5) responsive customer service and technical support. We manufacture commercial bakery equipment and ship to 30+ countries worldwide. Contact us for a free consultation and quote.
9. Pricing and ROI
9.1 Price Summary
| Type | Low End | Mid Range | High End |
|---|---|---|---|
| Countertop box | $200 | $600 | $1,000 |
| Under-counter | $1,000 | $2,000 | $3,000 |
| Reach-in (single door) | $2,000 | $3,500 | $5,000 |
| Reach-in (double door) | $4,000 | $6,000 | $8,000 |
| Roll-in | $4,000 | $8,000 | $15,000 |
| Pass-through | $5,000 | $8,000 | $12,000 |
| Proofing/retarder combo | $5,000 | $10,000 | $15,000 |
| Walk-in room | $10,000 | $25,000 | $50,000+ |
9.2 Additional Costs
- Delivery and installation: $100-$1,000 depending on size, weight, and location. Some suppliers include free delivery.
- Water supply connection: $100-$500 if a water line needs to be installed for the humidifier.
- Drain connection: $100-$300 if a floor drain or drain line is needed for condensation.
- Electrical work: $100-$500 if a dedicated circuit or outlet needs to be installed.
- Training: $100-$500 for operator training (many suppliers include basic training free).
- Maintenance contract: $300-$1,500/year for preventive maintenance and priority service (optional but recommended for expensive units).
- Spare parts: Set aside 3-5% of purchase price per year for parts (heating elements, sensors, seals, humidifier components, fans).
- Electricity: 0.5-3 kW power consumption, adding $20-$150/month to electricity bills depending on size and usage.
- Water: If using a steam humidifier, water use is minimal (1-5 liters/day), but a water supply line is needed.
- Rolling racks (for roll-in models): $200-$800 per rack if not already owned. Most roll-in proofers require compatible racks.
9.3 ROI Calculation Example
Medium bakery buying a $5,000 double-door reach-in proofing cabinet
| Reason | Value | Calculation |
|---|---|---|
| Daily dough production | 100 kg/day | Bread, buns, pastries |
| Ingredient cost | $2/kg | Flour, yeast, sugar, butter, etc. |
| Current waste rate (inconsistent proofing) | 8% | Over-proofed, under-proofed, skin formation |
| Waste after proofer | 2% | Consistent proofing = much less waste |
| Waste reduction | 6% | 8% - 2% = 6% |
| Daily waste savings | $12/day | 100 kg × $2/kg × 6% = $12/day |
| Daily labor savings | $15/day | 1 hour/day saved (no manual monitoring/adjusting) × $15/hour |
| Total daily savings | $27/day | Waste + labor |
| Working days/year | 300 days | 6 days/week × 50 weeks |
| Annual savings | $8,100/year | $27/day × 300 days |
| Purchase price | $5,000 | Double-door reach-in proofer |
| Payback period | 7.4 months | $5,000 ÷ $8,100/year × 12 months |
Most commercial proofing cabinets pay for themselves within 6-18 months through waste reduction, labor savings, and improved product quality. After payback, the proofer continues to generate savings for its 10-15 year lifespan — potentially $50,000+ in total savings over its lifetime.
10. Maintenance and Care
Proper maintenance ensures consistent performance, extends equipment life, prevents food safety issues, and avoids costly breakdowns. A well-maintained proofing cabinet can last 10-15 years or more.
10.1 Maintenance Schedule
| Task | Frequency | Description |
|---|---|---|
| Clean interior surfaces | Daily | Wipe walls, ceiling, floor, tray slides with mild detergent. Remove dough residue and spills. |
| Clean door seals | Daily | Wipe seals with damp cloth. Check for tears or damage. |
| Empty/clean water reservoir | Daily | Empty, clean with mild detergent, refill with fresh water. Prevents bacteria/mold. |
| Clean exterior | Daily | Wipe exterior, control panel, door handle with damp cloth. |
| check temp/humidity | Daily | Use separate thermometer/hygrometer to check accuracy. |
| Deep clean interior | Weekly | Remove all trays/slides, wash thoroughly, clean entire interior including corners. |
| Clean humidifier | Weekly | Clean heating part and water chamber, descale if needed. |
| check door seals | Weekly | Check for wear, cracks, damage. Replace if not sealing properly. |
| Check water supply/drain | Weekly | Check for leaks, clean drain line to prevent clogs. |
| Calibrate temp/humidity | Monthly | Use calibrated reference device, adjust if difference> ±1°C or ±5% RH. |
| Clean heating elements | Monthly | Gently clean to remove dust/flour (unplug unit first). |
| check fan/motor | Monthly | Check proper operation, listen for unusual noises, clean fan blades. |
| Check insulation | Monthly | Feel exterior walls — should be close to room temp. Warm spots indicate insulation issues. |
| Tighten hardware | Monthly | Check and tighten loose screws, hinges, handles, tray slides. |
| Professional checkion | Quarterly | Qualified technician checks heating elements, thermostat, humidistat, fan, electrical. |
| Descale water system | Quarterly | Descale humidifier, water lines, heating elements to remove mineral deposits. |
| Full professional service | Annually | complete service: calibrate sensors, test elements, lubricate, test safety, check electrical. |
| Replace worn parts | Annually | Replace door seals, tray slides, heating elements, sensors before they fail. |
| Deep clean behind/under | Annually | Move unit (if possible), clean behind and underneath to remove dust/flour. |
10.2 Common Problems and Solutions
| Problem | Possible Causes | Solutions |
|---|---|---|
| Temperature not reaching set point | Faulty heating part, faulty thermostat, poor door seal, overloaded cabinet, low ambient temp | Test/replace part, calibrate/replace thermostat, replace seal, reduce load, ensure room>15°C |
| Humidity too low | Empty water reservoir, clogged water line, faulty humidifier, faulty humidistat, door open too often | Refill water, clean water line, test/replace humidifier, calibrate/replace humidistat, minimize door opening |
| Humidity too high/condensation | Humidifier running constantly, faulty humidistat, poor ventilation, door seal leak, room humidity high | Adjust humidistat, calibrate/replace humidistat, ensure ventilation, replace seal, use dehumidifier |
| Uneven temp/humidity | Blocked air circulation (overloaded, trays too close), faulty circulation fan, poor insulation, door seal leak | Ensure proper tray spacing, test/replace fan, check insulation, replace seal |
| Water leaks | Cracked water reservoir, loose water line connection, clogged drain, condensation overflow | Replace reservoir, tighten connections, clean drain, check door seal |
| Unusual noises | Loose fan blade, faulty fan motor, vibrating panels, water boiling in humidifier | Tighten fan, replace motor, tighten panels, descale humidifier |
| Door not sealing | Worn/damaged seal, misaligned door, uneven floor, damaged hinge | Replace seal, realign door, level unit, replace hinge |
| Control panel not working | Power issue, faulty controller, loose wiring, blown fuse | Check power/outlet, test/replace controller, check wiring, replace fuse |
10.3 Maintenance Tips
- Always unplug the unit before cleaning or servicing (except for daily exterior wiping).
- Use only food-grade cleaners and sanitizers on food contact surfaces.
- Never use abrasive cleaners or scouring pads on stainless steel — they can scratch the surface.
- Follow the manufacturer's maintenance instructions — they know their equipment best.
- Keep a maintenance log — record all cleaning, calibration, repairs, and part replacements. This helps track equipment health and plan for replacements.
- Train all staff on daily cleaning and proper use — many problems are caused by improper use (overloading, leaving door open, spilling dough).
- deal with problems promptly — small issues become big, expensive problems if ignored. If you notice temperature fluctuations, unusual noises, or poor performance, look into immediately or call a service technician.
- Use filtered or softened water in the humidifier to reduce mineral buildup and extend the life of heating elements and sensors.
- Keep the area around the proofer clean and dry — flour dust can get into the unit and clog fans and heating elements.
11. Buying Checklist
Use this complete checklist when evaluating and comparing proofing cabinets:
11.1 Before Buying
- □ Calculate your daily dough sheeting/proofing volume (kg/day)
- □ List all yeast-leavened products and their proofing requirements
- □ Measure available space (width, depth, height, doorways, ceiling)
- □ Check electrical capacity (voltage, amperage, dedicated circuit needed)
- □ Check water supply and drain availability (for steam humidifiers)
- □ figure out budget (purchase + installation + maintenance + spare parts)
- □ study brands and read look overs
- □ Request quotes from 2-3 suppliers
- □ Ask for references from similar bakeries
- □ Check warranty terms and after-sales support
- □ check spare parts availability and cost in your country/region
11.2 Machine Evaluation
- □ Capacity suitable for current needs + 30-50% growth buffer
- □ Tray size compatible with your existing trays/racks
- □ Temperature range: at least 20-45°C (68-113°F)
- □ Humidity range: at least 60-95% RH
- □ Digital temperature and humidity control (not analog)
- □ Temperature accuracy: ±0.5°C or better
- □ Humidity accuracy: ±5% RH or better
- □ Programmable recipes/settings (at least 5-10 presets)
- □ Uniform air circulation with fan
- □ Quick recovery after door opening (2-5 minutes)
- □ All-stainless-steel construction (interior at minimum, exterior preferred)
- □ Thick insulation (at least 50mm / 2 inches)
- □ complete safety features (overheat protection, GFCI, grounding, fan guard)
- □ Easy to clean (removable parts, smooth surfaces, no crevices)
- □ Durable door seals (magnetic, removable for cleaning)
- □ Adjustable tray slides
- □ Adjustable leveling legs
- □ Good warranty (minimum 1 year, preferably 2-3 years)
- □ Available spare parts and service support
- □ Energy-efficient features (PID control, variable fan, thick insulation)
- □ Alarm/warning system for temp/humidity deviations
- □ Clear digital display showing set and actual temp/humidity
- □ Cool-touch exterior and door handle
11.3 Supplier Evaluation
- □ Reputable brand with track record
- □ Good customer look overs and references
- □ Responsive customer service and technical support
- □ Available spare parts (within your country/region)
- □ Clear warranty terms and conditions
- □ Installation and training offered
- □ Maintenance service contracts available
- □ Fair return/exchange policy
- □ Transparent pricing (no hidden fees)
- □ Delivery time acceptable (not too long)
Talk to Our Bakery Equipment Specialists
We have helped hundreds of bakery owners choose the right equipment. We can help you too. Send us your requirements and we will put together a customized solution for your bakery.
Get Proofing Cabinet Quote →12. Conclusion: Choose Wisely, Proof Perfectly
A proofing cabinet is one of the most impactful equipment investments a bakery can make. It ensures consistent, perfect proofing for every batch, regardless of weather or ambient conditions. It reduces waste, saves labor, improves product quality, and enables production that would be impossible at room temperature. Most proofers pay for themselves within 6-18 months and continue generating savings for 10-15 years.
Here's a summary of the important buying decisions:
- Type: Reach-in for small to medium bakeries (most versatile), roll-in for high-volume batch production, pass-through for linear workflow, under-counter for space-constrained small operations, combination proofing/retarder for overnight retarding.
- Size: Choose capacity 30-50% above current needs for growth. 8-18 trays for small, 18-36 trays for medium, 36+ trays for large. Make sure it's compatible with your existing trays/racks.
- Temperature/humidity control: Digital controls with ±0.5°C / ±5% RH accuracy. Programmable recipes for different products. Uniform air circulation. Quick recovery after door opening.
- Construction: All-stainless-steel interior (food-grade 304). Thick insulation (50mm+). Heavy-duty door with quality magnetic seals. Removable parts for easy cleaning.
- Safety: Overheat protection, GFCI (if water-connected), proper grounding, fan guard, cool-touch exterior, electrical certification (CE/UL/ETL).
- Energy efficiency: PID control, variable speed fan, thick insulation, efficient heating elements, automatic standby, LED lighting.
- Brand: Premium European for highest quality/budget; mid-range (HNH, Unox, Moretti) for Great value. Choose from budget, service availability, and feature needs.
- Price: $1,000-$3,000 for under-counter/small reach-in; $3,000-$8,000 for medium to large reach-in; $8,000-$15,000+ for roll-in/pass-through/combination. Most pay back in 6-18 months.
The most common mistake buyers make is choosing a proofer that's too small for their needs — it bottlenecks production, causes frustration, and often needs to be replaced within 1-2 years, costing more Over time. Buy for where you'll be in 2-3 years, not just today. A slightly larger machine with room to grow is a better investment than one that's maxed out from day one.
The second most common mistake is buying the cheapest machine without Given temperature/humidity control accuracy, durability, and after-sales support. A $1,500 proofer with poor temperature control that causes inconsistent product and waste is more expensive than a $4,000 proofer that produces perfect results every time. Invest in quality, and it will pay dividends for years.
Whether you're a small start-up proofing your first loaves or a large bakery producing thousands of units daily, the right proofing cabinet will transform your production, improve your quality, and boost your bottom line. Choose wisely, maintain it well, and enjoy perfectly proofed dough, every single time.
📋 Bakery Equipment Checklist
Download our complete bakery equipment checklist with budget estimates for 5 different bakery types.
Free Bakery Equipment Checklist →📋 Bakery Equipment ROI Calculator
Use our interactive ROI calculator to see how quickly your bakery equipment investment pays off.
Calculate Your Equipment ROI →📋 Bakery Equipment Maintenance Calendar
Get our printable maintenance calendar to keep your bakery equipment running at peak performance.
Printable Maintenance Calendar →📋 Bakery Equipment Energy Cost Calculator
Estimate your bakery equipment energy costs and find ways to reduce your utility bills.
Calculate Energy Costs →Related Articles
Learn More
- 👉 Bakery Equipment Selection Complete Guide: Choose by Output & Product
- 👉 Bakery Equipment Maintenance Schedule: Daily, Weekly, Monthly, Yearly
- 👉 Dough Divider Rounder Troubleshooting: 15 Common Problems & Solutions
- 👉 Small Bakery Equipment ROI & Payback Period Calculator
- 👉 Bakery Equipment Energy Consumption & Energy Saving Guide
- 👉 Bakery Equipment Food Safety & Hygiene Compliance Complete Guide